Kivy es una herramienta GUI independiente de la plataforma en Python. Como se puede ejecutar en Android, IOS, Linux y Windows, etc. Básicamente se usa para desarrollar la aplicación de Android, pero eso no significa que no se pueda usar en aplicaciones de escritorio.
Aplicación de dibujo:
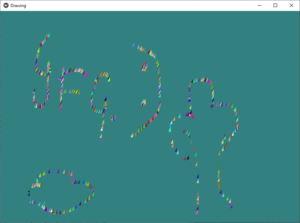
En esto, vamos a crear una aplicación de dibujo simple con la ayuda de kivy. Inicialmente, solo estamos haciendo un lienzo y un pincel para que, al mover el cursor, pueda sentirse como una aplicación de dibujo.
En esto, los widgets se agregan dinámicamente. Si los widgets se van a agregar dinámicamente, en tiempo de ejecución, según la interacción del usuario, solo se pueden agregar en el archivo de Python.
Estamos usando widgets, diseño, aleatorio para hacerlo bien.
Now Basic Approach of the App:

1) import kivy
2) import kivy App
3) import Relativelayout
4) import widget
5) set minimum version(optional)
6) Create widget class as needed
7) Create Layout class
8) create the App class
9) create .kv file
10) return the widget/layout etc class
11) Run an instance of the class
Implementación del Código:
# archivo .py:
Python3
# Program to explain how to create drawing App in kivy

# import kivy module
import kivy

# base Class of your App inherits from the App class.
# app:always refers to the instance of your application
from kivy.app import App

# this restrict the kivy version i.e
# below this kivy version you cannot
# use the app or software
kivy.require('1.9.0')

# Widgets are elements of a
# graphical user interface that
# form part of the User Experience.
from kivy.uix.widget import Widget

# This layout allows you to set relative coordinates for children.
from kivy.uix.relativelayout import RelativeLayout

# Create the Widget class
class Paint_brush(Widget):
    pass

# Create the layout class
# where you are defining the working of
# Paint_brush() class
class Drawing(RelativeLayout):

    # On mouse press how Paint_brush behave
    def on_touch_down(self, touch):
        pb = Paint_brush()
        pb.center = touch.pos
        self.add_widget(pb)

    # On mouse movement how Paint_brush behave
    def on_touch_move(self, touch):
        pb = Paint_brush()
        pb.center = touch.pos
        self.add_widget(pb)

# Create the App class
class DrawingApp(App):
    def build(self):
        return Drawing()

DrawingApp().run()
# archivo .ky:
Python3
# Drawing.kv implementation

# for assigning random color to the brush
#:import rnd random

# Paint brush coding
<Paint_brush>:
    size_hint: None, None
    size: 25, 50
    canvas:
        Color:
            rgb: rnd.random(), rnd.random(), rnd.random()
        Triangle:
            points:
                (self.x, self.y, self.x + self.width / 4, self.y,
                self.x + self.width / 4, self.y + self.height / 4)

# Drawing pad creation
<Drawing>:
    canvas:
        Color:
            rgb: .2, .5, .5
        Rectangle:
            size: root.size
            pos: root.pos
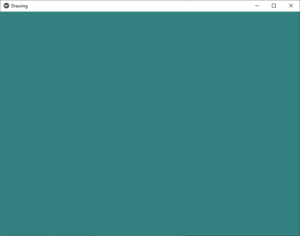
Producción:


Publicación traducida automáticamente
Artículo escrito por YashKhandelwal8 y traducido por Barcelona Geeks. The original can be accessed here. Licence: CCBY-SA