Kivy es una herramienta GUI independiente de la plataforma en Python. Como se puede ejecutar en Android, IOS, Linux y Windows, etc. Kivy le brinda la funcionalidad de escribir el código una vez y ejecutarlo en diferentes plataformas. Básicamente se usa para desarrollar la aplicación de Android, pero no significa que no se pueda usar en aplicaciones de escritorio.
Ahora, en este artículo, aprenderemos cómo crear un botón en kivy, al igual que el botón que usamos en las calculadoras y muchos más lugares, agregando funcionalidad al botón, estilo del botón.
El botón es una etiqueta con acciones asociadas que se activan cuando se presiona el botón (o se suelta después de un clic/toque). Podemos agregar funciones detrás del botón y diseñar el botón.
Enfoque básico a seguir al crear el botón:
-> import kivy
-> import kivy App
-> import button
-> set minimum version(optional)
-> Extend the class
-> Add and return a button
-> Run an instance of the class
Código #1: Cómo crear un botón en kivy.
Python3
# import kivy module
import kivy

# this restrict the kivy version i.e
# below this kivy version you cannot
# use the app or software
kivy.require("1.9.1")

# base Class of your App inherits from the App class.
# app:always refers to the instance of your application
from kivy.app import App

# creates the button in kivy
# if not imported shows the error
from kivy.uix.button import Button

# class in which we are creating the button
class ButtonApp(App):

    def build(self):

        btn = Button(text ="Push Me !")
        return btn

# creating the object root for ButtonApp() class
root = ButtonApp()

# run function runs the whole program
# i.e run() method which calls the
# target function passed to the constructor.
root.run()
Producción:
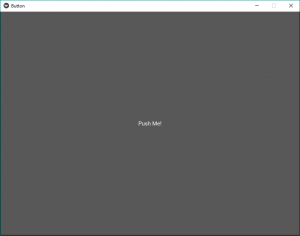
En el resultado anterior, el botón cubrirá toda la ventana, ya que no le hemos dado un tamaño específico ni hemos hecho ningún estilo en el botón, por lo que, de forma predeterminada, muestra el tamaño del botón igual al tamaño de la ventana.
Código n.º 2: diseñar el botón
Python3
def build(self):
        # use a (r, g, b, a) tuple
        btn = Button(text ="Push Me !",
                   font_size ="20sp",
                   background_color =(1, 1, 1, 1),
                   color =(1, 1, 1, 1),
                   size =(32, 32),
                   size_hint =(.2, .2),
                   pos =(300, 250))

        return btn
Producción:
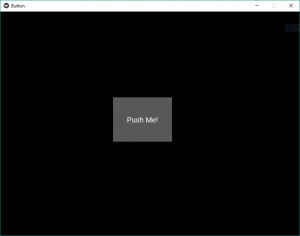
Estos son similares a los efectos HTML, CSS. Con esto, arreglamos la posición de un botón en el centro de la ventana, el tamaño del texto, el color y lo que quieras.
Código #3 Adición de funcionalidad detrás del botón.
Uno de los problemas comunes es cómo agregar funcionalidad al botón. Entonces, para agregar funcionalidad, usamos la función
bind() , vincula la función al botón. bind() crea un evento que se envía a callback().
Uno de los problemas más comunes para los nuevos usuarios de Kivy es entender mal cómo funciona el método de vinculación, especialmente entre los nuevos usuarios de Python que no han formado completamente su intuición sobre las llamadas a funciones.
La cuestión es que el método bind no conoce la existencia de una función o sus argumentos, solo recibe el resultado de esta llamada a la función. Como en el código dado, cuando se presiona el botón, imprime esa definición de «botón presionado» en la función de devolución de llamada.
En el código dado dentro de bind() usamos on_pressporque cuando se presiona el botón, le dice a la función que se presiona el botón, entonces el enlace usa su funcionalidad.
Python3
# import kivy module
import kivy

# this restrict the kivy version i.e
# below this kivy version you cannot
# use the app or software
kivy.require("1.9.1")

# base Class of your App inherits from the App class.
# app:always refers to the instance of your application
from kivy.app import App

# creates the button in kivy
# if not imported shows the error
from kivy.uix.button import Button

# class in which we are creating the button
class ButtonApp(App):

    def build(self):
        # use a (r, g, b, a) tuple
        btn = Button(text ="Push Me !",
                   font_size ="20sp",
                   background_color =(1, 1, 1, 1),
                   color =(1, 1, 1, 1),
                   size =(32, 32),
                   size_hint =(.2, .2),
                   pos =(300, 250))

        # bind() use to bind the button to function callback
        btn.bind(on_press = self.callback)
        return btn

    # callback function tells when button pressed
    def callback(self, event):
        print("button pressed")
        print('Yoooo !!!!!!!!!!!')


# creating the object root for ButtonApp() class
root = ButtonApp()

# run function runs the whole program
# i.e run() method which calls the target
# function passed to the constructor.
root.run()
Producción:
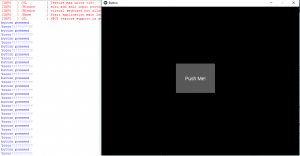
Salida de vídeo:
Botón usando KivyMD:
KivyMD es una extensión del marco Kivy. KivyMD es una colección de widgets de Material Design para usar con Kivy, un marco GUI para crear aplicaciones móviles.
A continuación se muestra un ejemplo de MDRectangularFlatButton
MDRectangleFlatButton tiene los siguientes parámetros:
- text- el texto que queremos poner en el botón
- pos_hint- un diccionario que tiene la posición con respecto al eje x y al eje y
- on_release- es una función que tiene las propiedades que queremos llamar al hacer clic en el botón
Python3
from kivymd.app import MDApp
from kivymd.uix.screen import Screen
from kivymd.uix.button import MDRectangleFlatButton

class Demo(MDApp):

    def build(self):
        screen = Screen()

        btn= MDRectangleFlatButton(text="Submit",pos_hint={'center_x':0.5,'center_y':0.3},on_release=self.btnfunc)
           screen.add_widget(btn)
        # adding widgets to screen

        return screen
    def btnfunc(self,obj):
        print("button is pressed!!")

if __name__=="__main__":
    Demo().run()
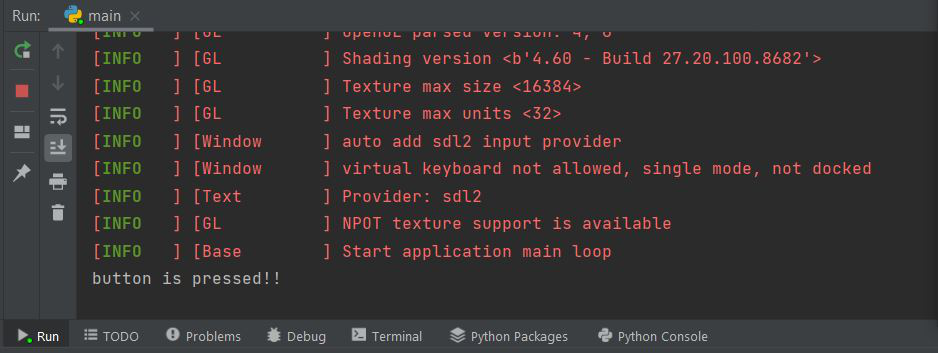
Producción:

Cuando se presiona el botón, muestra la siguiente salida
Publicación traducida automáticamente
Artículo escrito por YashKhandelwal8 y traducido por Barcelona Geeks. The original can be accessed here. Licence: CCBY-SA