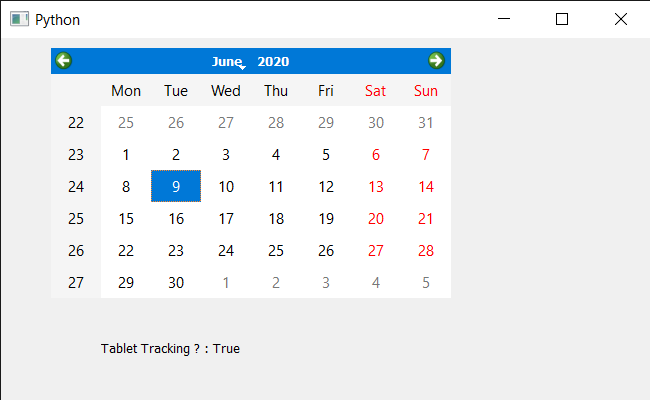
En este artículo veremos cómo podemos obtener la propiedad de seguimiento de tabletas del QCalendarWidget. Si el seguimiento de la tableta está deshabilitado (predeterminado), el calendario solo recibe eventos de movimiento de la tableta cuando el lápiz está en contacto con la tableta, o cuando se presiona al menos un botón del lápiz mientras se mueve el lápiz. Si el seguimiento de la tableta está habilitado, el calendario recibe eventos de movimiento de la tableta incluso cuando se encuentra cerca. Esto es útil para monitorear la posición, así como las propiedades auxiliares, como la rotación y la inclinación, y proporcionar comentarios en la interfaz de usuario. Podemos registrar la propiedad de seguimiento con la ayuda del setTabletTrackingmétodo.
Para hacer esto, usaremos
hasTabletTrackingel método con el objeto QCalendarWidget.Sintaxis: calendar.hasTabletTracking()
Argumento: no requiere argumento
Return : Devuelve bool
A continuación se muestra la implementación.
Python3
# importing libraries
from PyQt5.QtWidgets import *
from PyQt5 import QtCore, QtGui
from PyQt5.QtGui import *
from PyQt5.QtCore import *
import sys


class Window(QMainWindow):

    def __init__(self):
        super().__init__()

        # setting title
        self.setWindowTitle("Python ")

        # setting geometry
        self.setGeometry(100, 100, 650, 400)

        # calling method
        self.UiComponents()

        # showing all the widgets
        self.show()

    # method for components
    def UiComponents(self):

        # creating a QCalendarWidget object
        self.calendar = QCalendarWidget(self)

        # setting geometry to the calendar
        self.calendar.setGeometry(50, 10, 400, 250)

        # setting cursor
        self.calendar.setCursor(Qt.PointingHandCursor)

        # enabling tablet tracking
        self.calendar.setTabletTracking(True)

        # creating label to show the properties
        self.label = QLabel(self)

        # setting geometry to the label
        self.label.setGeometry(100, 280, 250, 60)

        # making label multi line
        self.label.setWordWrap(True)

        # getting tablet tracking
        value = self.calendar.hasTabletTracking()

        # setting text to the label
        self.label.setText("Tablet Tracking ? : " + str(value))


# create pyqt5 app
App = QApplication(sys.argv)

# create the instance of our Window
window = Window()

# start the app
sys.exit(App.exec())
Producción :
Publicación traducida automáticamente
Artículo escrito por rakshitarora y traducido por Barcelona Geeks. The original can be accessed here. Licence: CCBY-SA