El método canvas drawImage() de la API Canvas 2D se usa para dibujar una imagen de varias formas en un elemento canvas. Este método tiene parámetros adicionales que se pueden usar para mostrar la imagen o una parte de la imagen.
Sintaxis:
context.drawImage(img, x, y, swidth, sheight, sx, sy, width, height);
Acercarse:
- Agrega una imagen usando la etiqueta <img>.
- Dibuja el lienzo usando la etiqueta <canvas>.
- Cargue el lienzo y obtenga el contexto.
- Seleccione la imagen a utilizar,
- Dibuje la imagen junto con parámetros opcionales adicionales, si es necesario.
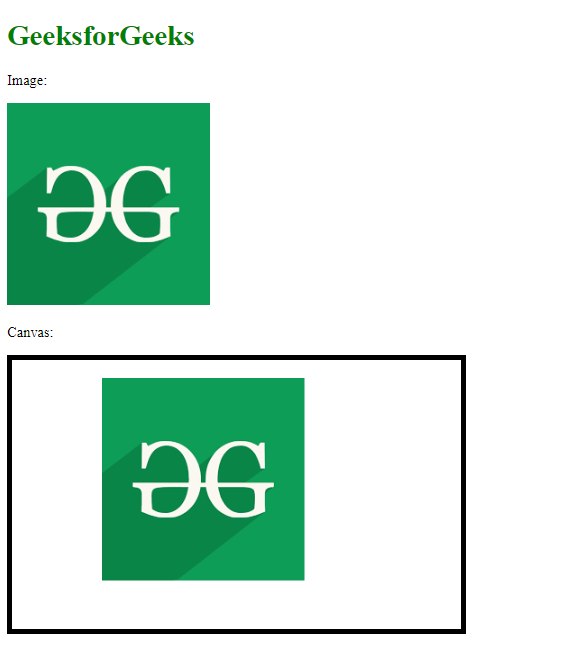
Ejemplo 1: en este ejemplo, la posición de la imagen en el lienzo se establece mediante parámetros adicionales.
html
<!DOCTYPE html>
<html>

<body>
    <h1 style="color: green;">
        GeeksforGeeks
    </h1>

    <p>Image:</p>

    <img id="gfg_image" src=
"https://media.geeksforgeeks.org/wp-content/uploads/20200604000733/gfg199.png" />

    <p>Canvas:</p>

    <canvas id="myGFGCanvas" width="500" height="300"
        style="border: 5px solid black">
    </canvas>

    <script>
        window.onload = function () {

            // Get the canvas element from the page
            var canvas = document.getElementById("myGFGCanvas");

            // Get the 2D context of the canvas
            var ctx = canvas.getContext("2d");

            // Get the image to be drawn on the canvas
            var image = document.getElementById("gfg_image");

            // Draw the image using drawImage() function

            // The first parameter is the image to be drawn

            // The second and third parameter is the
            // x and y position of the image in the canvas
            ctx.drawImage(image, 100, 20);
        };
    </script>
</body>

</html>
Producción:
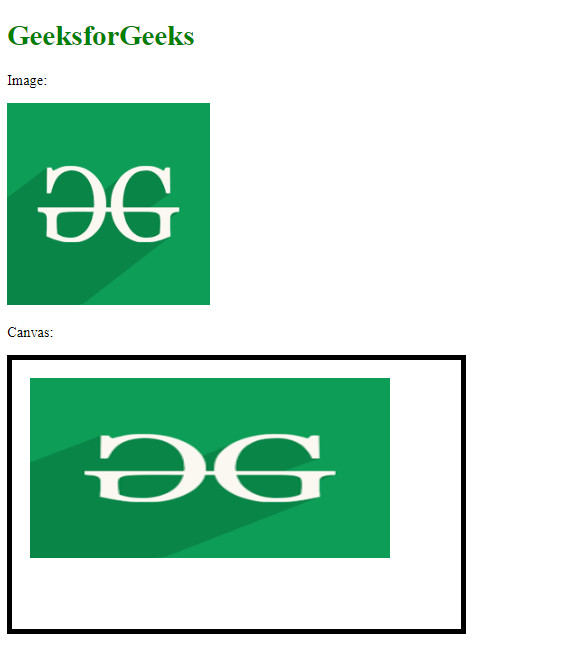
Ejemplo 2: En este ejemplo, la posición y las dimensiones de la imagen se establecen mediante parámetros adicionales.
HTML
<!DOCTYPE html>
<html>

<body>
    <h1 style="color: green;">
        GeeksforGeeks
    </h1>

    <p>Image:</p>

    <img id="gfg_image" src=
"https://media.geeksforgeeks.org/wp-content/uploads/20200604000733/gfg199.png" />

    <p>Canvas:</p>

    <canvas id="myGFGCanvas" width="500" height="300"
        style="border: 5px solid black">
    </canvas>

    <script>
        window.onload = function () {

            // Get the canvas element from the page
            var canvas = document.getElementById("myGFGCanvas");

            // Get the 2D context of the canvas
            var ctx = canvas.getContext("2d");

            // Get the image to be drawn on the canvas
            var image = document.getElementById("gfg_image");

            // Draw the image using drawImage() function

            // The first parameter is the image to be drawn

            // The second and third parameter is the
            // x and y position of the image in the canvas

            // The fourth and fifth parameter is the
            // width and height of the image to be drawn
            // in the canvas
            ctx.drawImage(image, 20, 20, 400, 200);
        };
    </script>
</body>

</html>
Producción:
Publicación traducida automáticamente
Artículo escrito por Vijay Sirra y traducido por Barcelona Geeks. The original can be accessed here. Licence: CCBY-SA