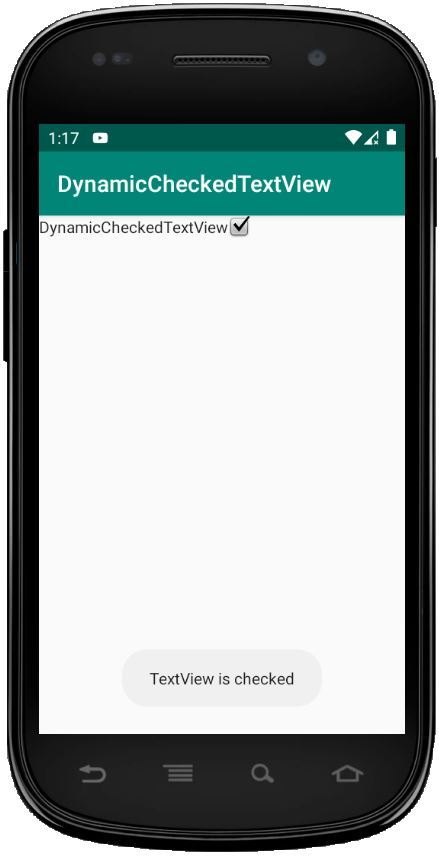
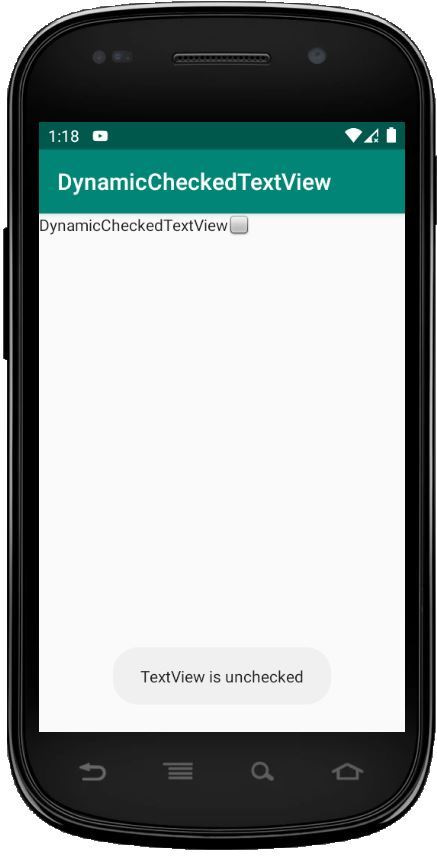
CheckedTextView se usa para implementar una interfaz verificable donde uno puede marcar o verificar los elementos necesarios o requeridos y omitir el resto.
En este artículo, discutiremos cómo hacer un CheckedTextView de forma dinámica o programática.
El primer paso es hacer o crear un proyecto en Android Studio. Aquí, crearemos un proyecto llamado DynamicCheckedTextView .
Para crear un nuevo proyecto:
- Haga clic en Archivo, luego en Nuevo => Nuevo proyecto
- Luego, marque Incluir compatibilidad con Kotlin y haga clic en el botón Siguiente .
- Seleccione SDK mínimo, lo que necesite.
- Seleccione Actividad vacía y luego haga clic en finalizar.
Ahora, necesitamos modificar nuestro diseño. Para hacerlo: vaya a aplicación > res > diseño y pegue el siguiente código:
Modifique el archivo activity_main.xml
<?xml version="1.0" encoding="utf-8"?>
<RelativeLayout
    xmlns:android="http://schemas.android.com/apk/res/android"
    android:id="@+id/relativeLayout"
    xmlns:tools="http://schemas.android.com/tools"
    android:layout_width="match_parent"
    android:layout_height="match_parent"
    tools:context=".MainActivity">

</RelativeLayout>
El siguiente paso es agregar las strings que se mostrarán cuando marquemos o desmarquemos CheckedTextView.
Vaya a res/values/strings.xml y agregue las siguientes líneas.
<resources>
    <string name="app_name">DynamicCheckedTextView</string>
    <string name="checked">checked</string>
    <string name="unchecked">unchecked</string>
    <string name="pre_msg">TextView is</string>
</resources>
Use el código CheckedTextView en el archivo MainActivity.kt
El paso final es codificar nuestro CheckedTextView. Abra app/src/main/java/ suNombreDePaquete /MainActivity.kt
package com.geeksforgeeks.myfirstkotlinapp

import androidx.appcompat.app.AppCompatActivity
import android.os.Bundle
import android.view.ViewGroup
import android.widget.CheckedTextView
import android.widget.RelativeLayout
import android.widget.Toast

class MainActivity : AppCompatActivity() {

    override fun onCreate(savedInstanceState: Bundle?) {
        super.onCreate(savedInstanceState)
        setContentView(R.layout.activity_main)
        //getting our layout
        val relativeLayout = findViewById<RelativeLayout>(R.id.relativeLayout)
        //using checktextview
        val checkedTextView = CheckedTextView(this)
        checkedTextView.layoutParams = RelativeLayout.
            LayoutParams(ViewGroup.LayoutParams.WRAP_CONTENT,
            ViewGroup.LayoutParams.WRAP_CONTENT)
        //using our strings.xml to set text
        checkedTextView.setText(R.string.app_name)
        //initially the checkbox in unchecked
        checkedTextView.isChecked = false
        checkedTextView.setCheckMarkDrawable(android.R.drawable.
            checkbox_off_background)

        //Onclick event for checkbox
        checkedTextView.setOnClickListener {
            checkedTextView.isChecked = !checkedTextView.isChecked
            checkedTextView.setCheckMarkDrawable(if (checkedTextView.isChecked)
                android.R.drawable.checkbox_on_background
                else android.R.drawable.checkbox_off_background)

            //using our strings.xml setting the starting message of the toast
            val message = getString(R.string.pre_msg) + " " +
                    if (checkedTextView.isChecked)
                getString(R.string.checked)
                    else getString(R.string.unchecked)
            Toast.makeText(this@MainActivity, message, Toast.LENGTH_LONG).show()
        }

        // Add Checkbox to RelativeLayout
        relativeLayout?.addView(checkedTextView)

    }
}
Archivo AndroidManifest.xml
<?xml version="1.0" encoding="utf-8"?>
<manifest xmlns:android="http://schemas.android.com/apk/res/android"
    package="com.geeksforgeeks.myfirstkotlinapp">

    <application
        android:allowBackup="true"
        android:icon="@mipmap/ic_launcher"
        android:label="@string/app_name"
        android:roundIcon="@mipmap/ic_launcher_round"
        android:supportsRtl="true"
        android:theme="@style/AppTheme">
        <activity android:name=".MainActivity">
            <intent-filter>
                <action android:name="android.intent.action.MAIN" />

                <category android:name="android.intent.category.LAUNCHER" />
            </intent-filter>
        </activity>
    </application>

</manifest>
Ejecutar como emulador:

