Prerrequisitos: Python GUI – tkinter , Python: Pillow
¿Alguna vez te has preguntado cómo hacer un visor de imágenes con la ayuda de Python? Aquí hay una solución para hacer el visor de imágenes con la ayuda de Python. Podemos hacer esto con la ayuda de Tkinter y Pillow. Discutiremos el módulo necesario y el código a continuación.
Módulo necesario
- Tkinter: Tkinter es una biblioteca con la ayuda de la cual podemos hacer GUI (interfaz gráfica de usuario).
pip install tkinter
- Pillow: Podemos agregar fotos ya que es una biblioteca de imágenes de Python.
pip install pillow
Ahora vamos a codificarlo
Empezando
- El siguiente código demuestra las estructuras básicas, la inicialización de botones y el diseño de la GUI producida
Python3
# importing the tkinter module and PIL that
# is pillow module
from tkinter import *
from PIL import ImageTk, Image

# Calling the Tk (The initial constructor of tkinter)
root = Tk()

# We will make the title of our app as Image Viewer
root.title("Image Viewer")

# The geometry of the box which will be displayed
# on the screen
root.geometry("700x700")

# Adding the images using the pillow module which
# has a class ImageTk We can directly add the
# photos in the tkinter folder or we have to
# give a proper path for the images
image_no_1 = ImageTk.PhotoImage(Image.open("Sample.png"))
image_no_2 = ImageTk.PhotoImage(Image.open("sample.png"))
image_no_3 = ImageTk.PhotoImage(Image.open("Sample.png"))
image_no_4 = ImageTk.PhotoImage(Image.open("sample.png"))

# List of the images so that we traverse the list
List_images = [image_no_1, image_no_2, image_no_3, image_no_4]

label = Label(image=image_no_1)

# We have to show the box so this below line is needed
label.grid(row=1, column=0, columnspan=3)

# We will have three button back ,forward and exit
button_back = Button(root, text="Back", command=back,
                     state=DISABLED)

# root.quit for closing the app
button_exit = Button(root, text="Exit",
                     command=root.quit)

button_forward = Button(root, text="Forward",
                        command=lambda: forward(1))

# grid function is for placing the buttons in the frame
button_back.grid(row=5, column=0)
button_exit.grid(row=5, column=1)
button_forward.grid(row=5, column=2)

root.mainloop()
- Función de reenvío: esta función es para agregar la funcionalidad al botón de reenvío
Python3
def forward(img_no):

    # GLobal variable so that we can have
    # access and change the variable
    # whenever needed
    global label
    global button_forward
    global button_back
    global button_exit
    label.grid_forget()

    # This is for clearing the screen so that
    # our next image can pop up
    label = Label(image=List_images[img_no-1])

    # as the list starts from 0 so we are
    # subtracting one
    label.grid(row=1, column=0, columnspan=3)
    button_for = Button(root, text="forward",
                        command=lambda: forward(img_no+1))

    # img_no+1 as we want the next image to pop up
    if img_no == 4:
        button_forward = Button(root, text="Forward",
                                state=DISABLED)

    # img_no-1 as we want previous image when we click
    # back button
    button_back = Button(root, text="Back",
                         command=lambda: back(img_no-1))

    # Placing the button in new grid
    button_back.grid(row=5, column=0)
    button_exit.grid(row=5, column=1)
    button_for.grid(row=5, column=2)
- Función hacia atrás: esta función es para agregar la funcionalidad al botón hacia atrás
Python3
def back(img_no):

    # We will have global variable to access these
    # variable and change whenever needed
    global label
    global button_forward
    global button_back
    global button_exit
    label.grid_forget()

    # for clearing the image for new image to pop up
    label = Label(image=List_images[img_no - 1])
    label.grid(row=1, column=0, columnspan=3)
    button_forward = Button(root, text="forward",
                            command=lambda: forward(img_no + 1))
    button_back = Button(root, text="Back",
                         command=lambda: back(img_no - 1))
    print(img_no)

    # whenever the first image will be there we will
    # have the back button disabled
    if img_no == 1:
        button_back = Button(root, Text="Back", state=DISABLED)

    label.grid(row=1, column=0, columnspan=3)
    button_back.grid(row=5, column=0)
    button_exit.grid(row=5, column=1)
    button_for.grid(row=5, column=2)
Código completo
Imágenes utilizadas y su orden –
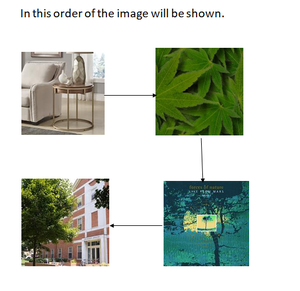
Orden en que se mostrarán las imágenes.
Python3
# importing the tkinter module and PIL
# that is pillow module
from tkinter import *
from PIL import ImageTk, Image


def forward(img_no):

    # GLobal variable so that we can have
    # access and change the variable
    # whenever needed
    global label
    global button_forward
    global button_back
    global button_exit
    label.grid_forget()

    # This is for clearing the screen so that
    # our next image can pop up
    label = Label(image=List_images[img_no-1])

    # as the list starts from 0 so we are
    # subtracting one
    label.grid(row=1, column=0, columnspan=3)
    button_for = Button(root, text="forward",
                        command=lambda: forward(img_no+1))

    # img_no+1 as we want the next image to pop up
    if img_no == 4:
        button_forward = Button(root, text="Forward",
                                state=DISABLED)

    # img_no-1 as we want previous image when we click
    # back button
    button_back = Button(root, text="Back",
                         command=lambda: back(img_no-1))

    # Placing the button in new grid
    button_back.grid(row=5, column=0)
    button_exit.grid(row=5, column=1)
    button_for.grid(row=5, column=2)


def back(img_no):

    # We will have global variable to access these
    # variable and change whenever needed
    global label
    global button_forward
    global button_back
    global button_exit
    label.grid_forget()

    # for clearing the image for new image to pop up
    label = Label(image=List_images[img_no - 1])
    label.grid(row=1, column=0, columnspan=3)
    button_forward = Button(root, text="forward",
                            command=lambda: forward(img_no + 1))
    button_back = Button(root, text="Back",
                         command=lambda: back(img_no - 1))
    print(img_no)

    # whenever the first image will be there we will
    # have the back button disabled
    if img_no == 1:
        button_back = Button(root, Text="Back", state=DISABLED)

    label.grid(row=1, column=0, columnspan=3)
    button_back.grid(row=5, column=0)
    button_exit.grid(row=5, column=1)
    button_for.grid(row=5, column=2)


# Calling the Tk (The initial constructor of tkinter)
root = Tk()

# We will make the title of our app as Image Viewer
root.title("Image Viewer")

# The geometry of the box which will be displayed
# on the screen
root.geometry("700x700")

# Adding the images using the pillow module which
# has a class ImageTk We can directly add the
# photos in the tkinter folder or we have to
# give a proper path for the images
image_no_1 = ImageTk.PhotoImage(Image.open("Sample.png"))
image_no_2 = ImageTk.PhotoImage(Image.open("sample.png"))
image_no_3 = ImageTk.PhotoImage(Image.open("Sample.png"))
image_no_4 = ImageTk.PhotoImage(Image.open("sample.png"))

# List of the images so that we traverse the list
List_images = [image_no_1, image_no_2, image_no_3, image_no_4]

label = Label(image=image_no_1)

# We have to show the box so this below line is needed
label.grid(row=1, column=0, columnspan=3)

# We will have three button back ,forward and exit
button_back = Button(root, text="Back", command=back,
                     state=DISABLED)

# root.quit for closing the app
button_exit = Button(root, text="Exit",
                     command=root.quit)

button_forward = Button(root, text="Forward",
                        command=lambda: forward(1))

# grid function is for placing the buttons in the frame
button_back.grid(row=5, column=0)
button_exit.grid(row=5, column=1)
button_forward.grid(row=5, column=2)

root.mainloop()
Producción:
Publicación traducida automáticamente
Artículo escrito por abhisheksrivastaviot18 y traducido por Barcelona Geeks. The original can be accessed here. Licence: CCBY-SA