En este artículo, vamos a crear una aplicación GUI para Light/Dark Theme Changer usando Tkinter en Python .
¿Has pensado en crear un Theme Changer usando Python? En este artículo, vamos a aprender cómo crear un Theme Changer simple en Python usando Tkinter .
Python proporciona una serie de bibliotecas para satisfacer nuestras necesidades y Tkinter es una de ellas. Tkinter es una biblioteca estándar en Python que se puede usar para crear fácilmente aplicaciones de interfaz gráfica de usuario. Proporciona un poderoso conjunto de herramientas con la ayuda de la cual podemos crear páginas o ventanas y agregarles widgets como botones, etiquetas, barras de desplazamiento y cuadros de texto.
requisitos previos
- Debemos tener conocimientos básicos de Python.
- El módulo Tkinter debe estar instalado en el sistema.
- Imágenes de interruptores claros y oscuros en formato .png que se pueden descargar de Google.
- Debemos tener conocimientos básicos de recorte de imágenes.
Instalación
Tkinter se puede instalar ejecutando el siguiente comando en el símbolo del sistema:
pip install tk
Implementación paso a paso
Ahora, escribiremos el script de Python para nuestro cambiador de temas.
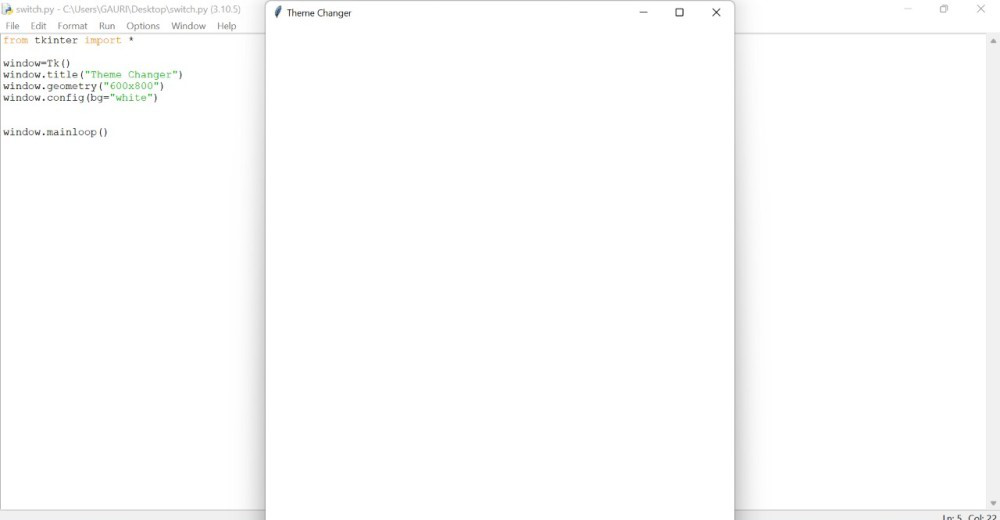
Paso 1: Creando una ventana Tkinter simple.
Considere el siguiente código:
Python3
# Importing Tkinter library in
# the environment
from tkinter import *

# Creating a window
window = Tk()

# Adding title to the window
window.title("Theme Changer")

# Setting geometry of the window
window.geometry("600x800")

# Setting background color of
# the window
window.config(bg="white")

window.mainloop()
Producción:

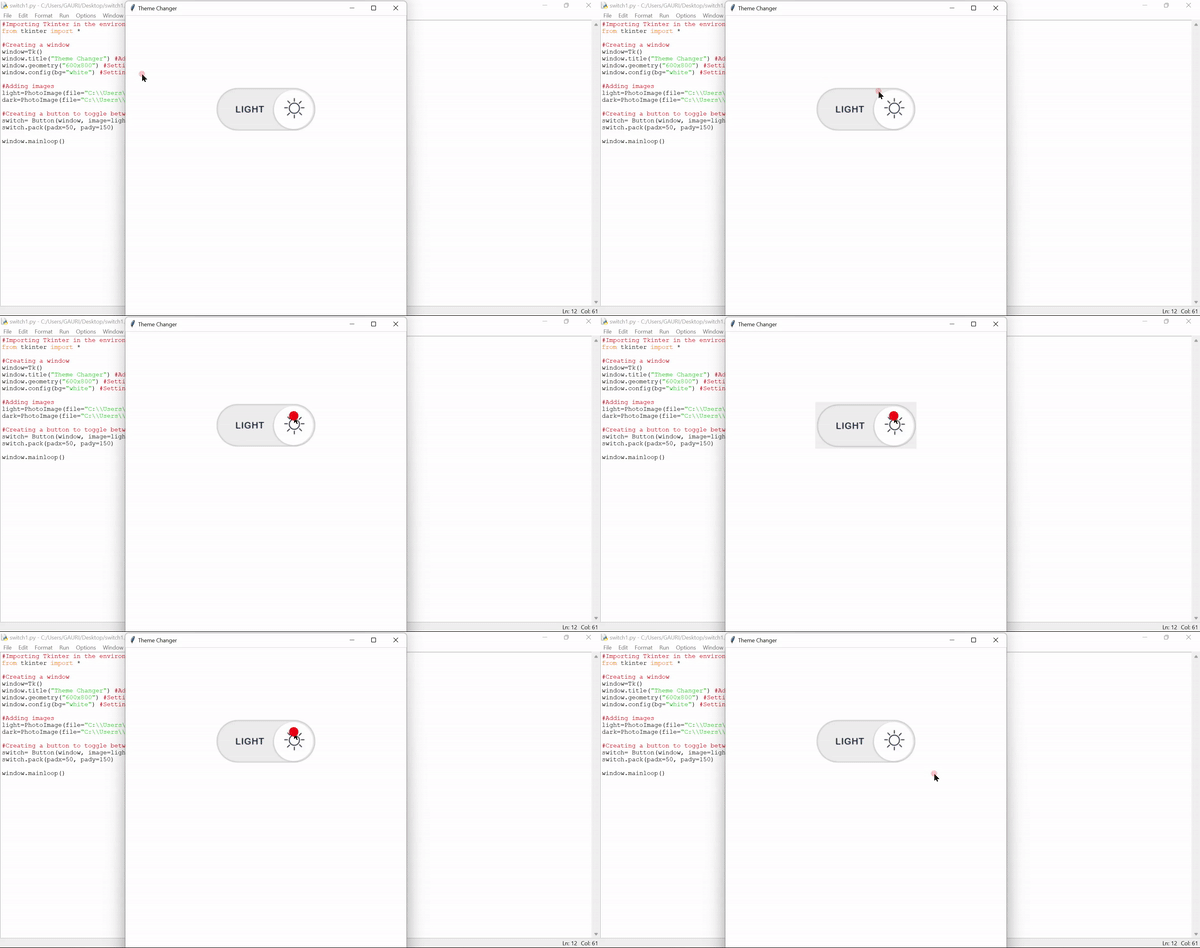
Paso 2: ahora, agregaremos el botón de modo claro/oscuro en la ventana.
En Tkinter, podemos usar imágenes como botones. Para hacer esto, necesitamos crear un objeto PhotoImage y pasarle el argumento de la imagen. La siguiente sintaxis se puede utilizar para crear un objeto PhotoImage:
PhotoImage(file=ruta_de_la_imagen)
- El widget de botón se utiliza para crear un botón en la ventana. Aquí, se creará un botón con light.png y color de fondo blanco.
- El método Pack() se usa para establecer la posición del botón en la ventana.
Python3
# Importing Tkinter library
# in the environment
from tkinter import *

# Creating a window
window = Tk()
window.title("Theme Changer")
window.geometry("600x800")
window.config(bg="white")

# Adding light and dark mode images
light = PhotoImage(file="light.png")
dark = PhotoImage(file="dark.png")

# Creating a button to toggle
# between light and dark themes
switch = Button(window, image=light,
                bd=0, bg="white")

# setting the position of the button
switch.pack(padx=50, pady=150)

window.mainloop()
Producción:

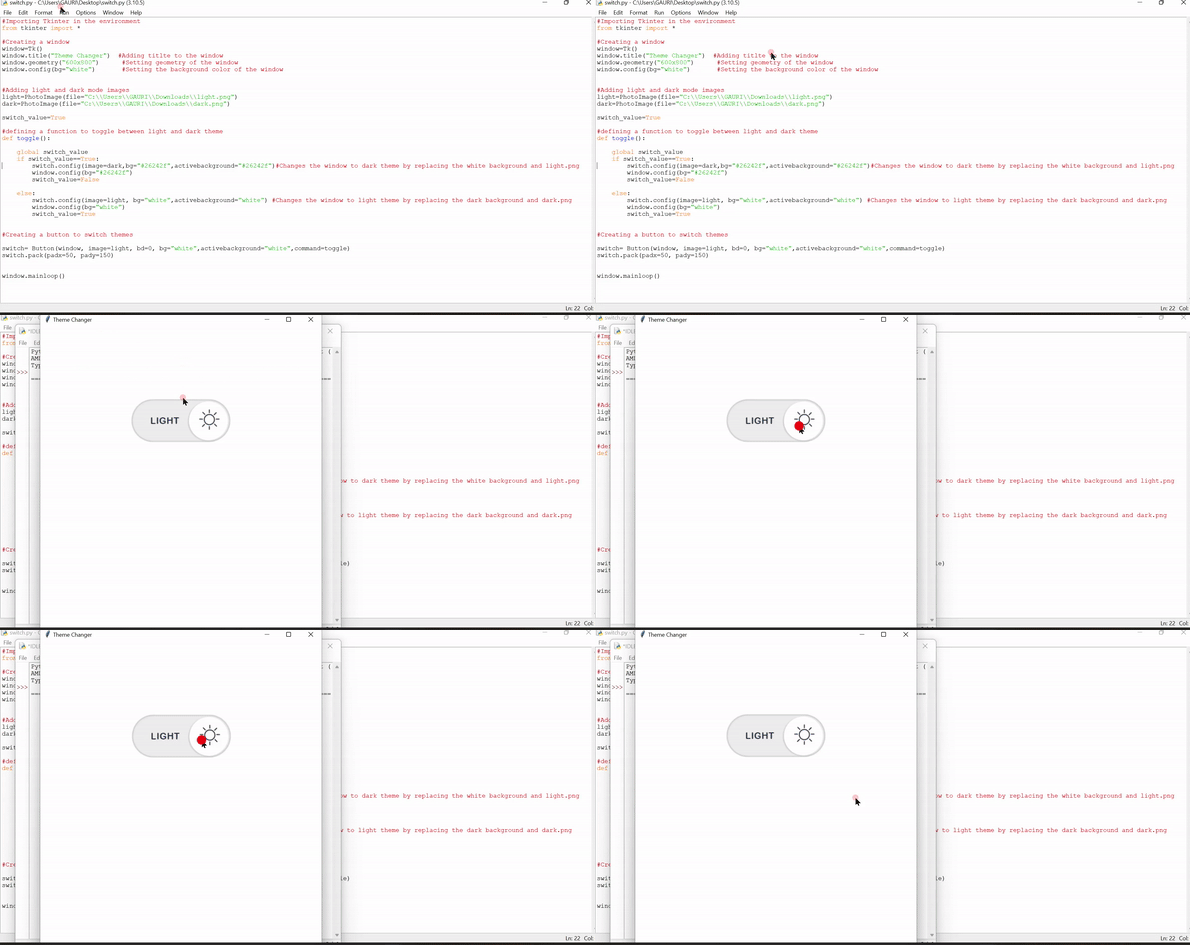
Paso 3: Ahora, crearemos una función para cambiar entre los temas.
Python3
# Importing Tkinter library
# in the environment
from tkinter import *

# Creating a window
window = Tk()
window.title("Theme Changer")
window.geometry("600x800")
window.config(bg="white")


# Adding light and dark mode images
light = PhotoImage(file="light.png")
dark = PhotoImage(file="dark.png")

switch_value = True

# Defining a function to toggle
# between light and dark theme
def toggle():

    global switch_value
    if switch_value == True:
        switch.config(image=dark, bg="#26242f",
                      activebackground="#26242f")

        # Changes the window to dark theme
        window.config(bg="#26242f")
        switch_value = False

    else:
        switch.config(image=light, bg="white",
                      activebackground="white")

        # Changes the window to light theme
        window.config(bg="white")
        switch_value = True


# Creating a button to toggle
# between light and dark themes
switch = Button(window, image=light,
                bd=0, bg="white",
                activebackground="white",
                command=toggle)
switch.pack(padx=50, pady=150)

window.mainloop()
Producción:

Publicación traducida automáticamente
Artículo escrito por gaurisaxena7379 y traducido por Barcelona Geeks. The original can be accessed here. Licence: CCBY-SA