Cuando creamos cualquier elemento secundario de una fila o columna, proporcionamos el tamaño del widget de acuerdo con el tamaño de la pantalla, pero a veces, cuando proporcionamos más tamaño del elemento secundario en comparación con el tamaño de la pantalla, recibimos una advertencia y nuestro widget sale de la pantalla para resolverse. esto ponemos un elemento secundario de una fila o columna en un widget expandido para que el elemento secundario ocupe solo el espacio disponible a lo largo del eje principal. Cuando creamos varios niños, el espacio disponible entre los niños se dividirá según el factor flexible. Un widget expandido contiene solo el widget con estado o el widget sin estado, no otros tipos de widgets como RenderObjectWidgets .
Syntax:
Expanded(
         {
          Key key,
          int flex: 1,
          @required Widget child,
         }
)
Propiedades de Clase Expandida:
- child: este es el widget presente debajo de la clase expandida
- Flex factor: Flex factor es la proporción en la que el espacio disponible se divide entre los niños para ocupar el eje principal. Si el factor de flexión es cero o NULL, el niño asignará su tamaño por sí solo.
- Clave: Gestiona cómo un widget es reemplazado por otro widget
- FlexFit: Define qué tan flexible es un widget para adquirir el espacio disponible.
Ejemplo:
Dart
import 'package:flutter/material.dart';

void main() {
  return runApp(
    MaterialApp(
      home: Scaffold(
        backgroundColor: Colors.green,

        // App Bar is used to create
        // a bar to give a title for our app
        appBar: AppBar(
          centerTitle: true,
          title: const Text(
            'GeeksforGeeks',

            // TextStyle is a class
            // where we can modify our text
            style: TextStyle(
              //To assign the color to our text
              color: Colors.green,
            ), //Text Style
          ), //Text

          // backgroundColor is used to change
          // the color of our app bar background
          backgroundColor: Colors.white,
        ), //AppBar

        // Calling the function DicePage()
        body: const DicePage(),
      ), //Scaffold
    ), //Material App
  );
}

class DicePage extends StatefulWidget {
  const DicePage({Key? key}) : super(key: key);

  @override
  // ignore: library_private_types_in_public_api
  _DicePageState createState() => _DicePageState();
}

class _DicePageState extends State<DicePage> {
  @override
  Widget build(BuildContext context) {
    return Center(
      //Here we are using the row.
      // Instead of row we can also use
      // column only the alignment of icon
      // will change and other function remains same
      child: Row(
        children: <Widget>[
          Expanded(
            // FlatButton is used to make
            // are image as a button which we can press.
            child: TextButton(
              child: Container(
                color: Colors.green,
                padding: const EdgeInsets.all(14),
                child: Image.asset('image/dicel.png'),
              ),
              onPressed: () {},
            ),

            // FlatButton is depreacted and should not be use
            // We can use TextButton instead of FlatButton

            // child: FlatButton(
            //   //Image.asset is used to import the image
            //   // from our project files only in brackets
            //   // we are providing the name of our image.
            //   child: Image.asset('images/dice1.png'),
            // ), //flat button
          ), //Expanded
        ], //<Widget>
      ), //Row
    ); //center
  }
}
Producción:
En la imagen de abajo, la imagen de los dados sale de la pantalla porque el tamaño requerido para la imagen es mayor que el tamaño de la pantalla.
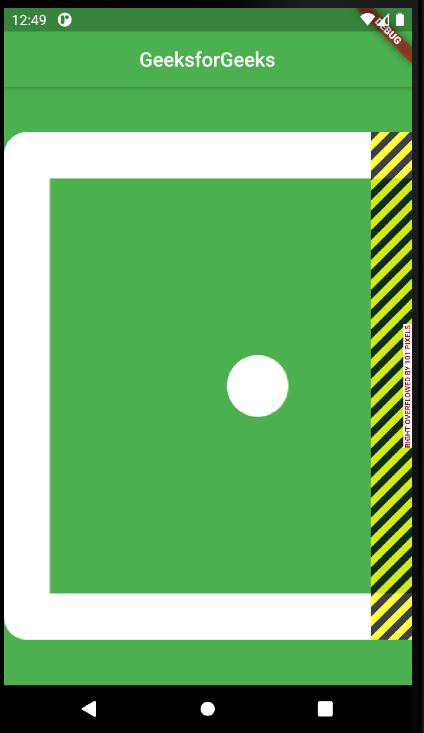
Sin usar la clase Expandida
Hemos utilizado la clase Expandida para hacer que nuestra imagen sea más flexible para que se ajuste al tamaño de la pantalla.
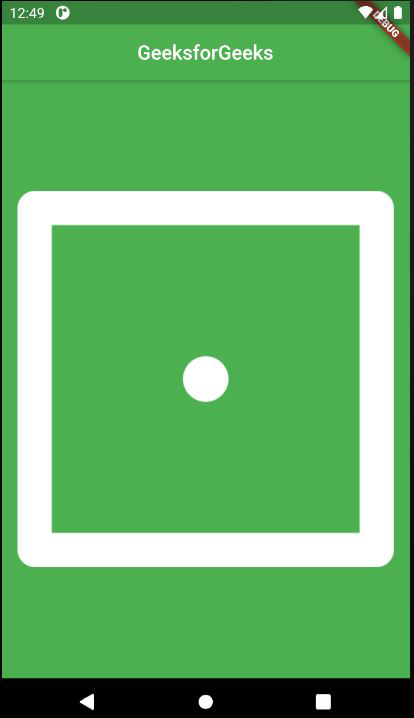
Imagen después de usar la clase Expandida
Al usar la clase Expandida, nuestra imagen se ha ajustado solo al espacio disponible.
Ejemplo: para insertar múltiples imágenes
Dart
import 'package:flutter/material.dart';

void main() {
  return runApp(
    MaterialApp(
      home: Scaffold(
        backgroundColor: Colors.green,

        // App Bar is used to create
        // a bar to give a title for our app
        appBar: AppBar(
          centerTitle: true,
          title: const Text(
            'GeeksforGeeks',

            // TextStyle is a class
            // where we can modify our text
            style: TextStyle(
              //To assign the color to our text
              color: Colors.green,
            ), //Text Style
          ), //Text

          // backgroundColor is used to
          // change the color of our
          // app bar background
          backgroundColor: Colors.white,
        ), //AppBar

        //Calling the function DicePage()
        body: const DicePage(),
      ), //Scaffold
    ), //Material App
  );
}

class DicePage extends StatefulWidget {
  const DicePage({Key? key}) : super(key: key);

  @override
  // ignore: library_private_types_in_public_api
  _DicePageState createState() => _DicePageState();
}

class _DicePageState extends State<DicePage> {
  @override
  Widget build(BuildContext context) {
    return Center(
      // Here we are using the row.
      // Instead of row we can also use column only
      // the alignment of icon will change and other
      // function remains same
      child: Row(
        children: <Widget>[
          // For Image 1
          Expanded(
            // Flex is used to allocate
            // available space in the ratio
            // of one child to another child
            // it can be any value.
            flex: 2,

            child: TextButton(
              child: Container(
                color: Colors.green,
                padding: const EdgeInsets.all(14),
                child: Image.asset('image/dicel1.png'),
              ),
              onPressed: () {},
            ),

            // FlatButton is depreacted and should not be use
            // We can use TextButton instead of FlatButton

            // FlatButton is used to make
            // are image as a button which we can press.

            // child: FlatButton(
            //   // Image.asset is used to import
            //   // the image from our project files only
            //   // in brackets we are providing the name of our image.
            //    child: Image.asset('images/dice1.png'),
            //  ),  //flat button
          ),
          // For image 2.
          Expanded(
            child: TextButton(
              child: Container(
                color: Colors.green,
                padding: const EdgeInsets.all(14),
                child: Image.asset('image/dicel2.png'),
              ),
              onPressed: () {},
            ),

            // FlatButton is depreacted and should not be use
            // We can use TextButton instead of FlatButton

            //  child: FlatButton(
            //    child: Image.asset('images/dice2.png'),
            //  ),  //flat button
          ), //Expanded
        ], //<Widget>
      ), //Row
    ); //center
  }
}
Producción:
En esto, hemos insertado la imagen múltiple de dados. De forma predeterminada, el tamaño flexible es 1, pero podemos cambiarlo según nuestros requisitos.

Múltiples Imágenes
Este factor Flex se establece en 2 y la imagen 1 tiene el doble del tamaño de la imagen dos.
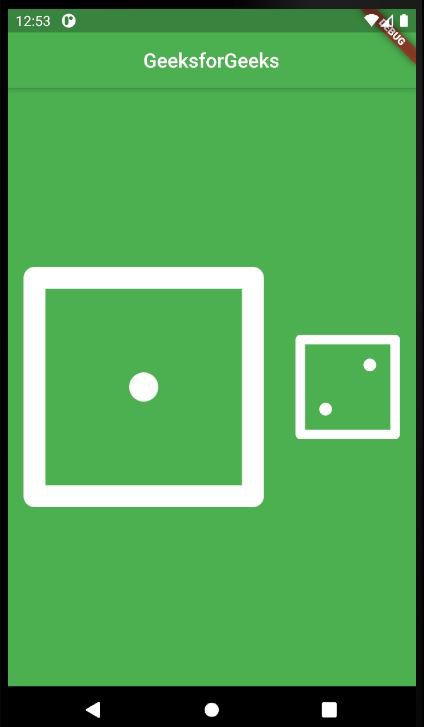
Múltiples imágenes con factor Flex