En Windows Forms, el control RadioButton se usa para seleccionar una sola opción entre el grupo de opciones. Por ejemplo, seleccione su género de la lista dada, por lo que elegirá solo una opción entre tres opciones como Hombre, Mujer o Transgénero. En Windows Forms, puede ajustar el relleno del RadioButton usando la Propiedad de relleno del RadioButton. Aquí, el relleno es el espacio entre el contenido y los límites del RadioButton. Puede establecer esta propiedad de dos maneras diferentes:
1. Tiempo de diseño: es la forma más fácil de ajustar el relleno del RadioButton como se muestra en los siguientes pasos:
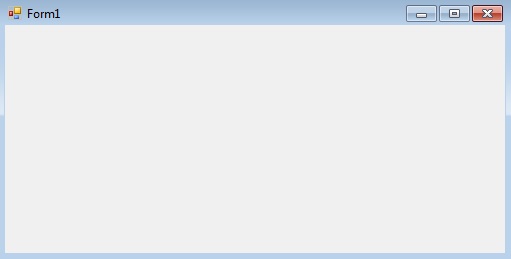
- Paso 1: cree un formulario de Windows como se muestra en la siguiente imagen:
Visual Studio -> Archivo -> Nuevo -> Proyecto -> WindowsFormApp
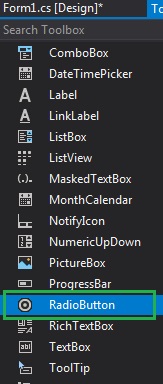
- Paso 2: arrastre el control RadioButton desde ToolBox y suéltelo en el formulario de Windows. Puede colocar un control RadioButton en cualquier lugar del formulario de Windows según sus necesidades.

- Paso 3: Después de arrastrar y soltar, irá a las propiedades del control RadioButton para ajustar el relleno de RadioButton.

Producción:

2. Tiempo de ejecución: es un poco más complicado que el método anterior. En este método, puede ajustar el relleno del control RadioButton mediante programación con la ayuda de la sintaxis dada:
public System.Windows.Forms.Padding Padding { get; set; }
Aquí, Padding representa el espacio entre el texto y los límites del RadioButton. Los siguientes pasos muestran cómo ajustar dinámicamente el relleno del RadioButton:
- Paso 1: crear un botón de radio utilizando el constructor RadioButton() proporcionado por la clase RadioButton.
// Creating radio button
RadioButton r1 = new RadioButton();
- Paso 2: después de crear RadioButton, configure la propiedad Padding del RadioButton proporcionada por la clase RadioButton.
// Setting the padding of the radio button
r1.Padding = new Padding(6, 6, 6, 6);
- Paso 3: Y por último agregue este control RadioButton al formulario usando el método Add().
// Add this radio button to the form
this.Controls.Add(r1);
Ejemplo:
usingSystem;usingSystem.Collections.Generic;usingSystem.ComponentModel;usingSystem.Data;usingSystem.Drawing;usingSystem.Linq;usingSystem.Text;usingSystem.Threading.Tasks;usingSystem.Windows.Forms;namespaceWindowsFormsApp23 {publicpartialclassForm1 : Form {publicForm1(){InitializeComponent();}privatevoidForm1_Load(objectsender, EventArgs e){// Creating and setting labelLabel l =newLabel();l.AutoSize =true;l.Location =newPoint(176, 40);l.Text ="Select Post";// Adding this label to the formthis.Controls.Add(l);// Creating and setting the// properties of the RadioButtonRadioButton r1 =newRadioButton();r1.AutoSize =true;r1.Text ="Intern";r1.Location =newPoint(286, 40);r1.BackColor = Color.LightSteelBlue;r1.Padding =newPadding(6, 6, 6, 6);// Adding this label to the formthis.Controls.Add(r1);// Creating and setting the// properties of the RadioButtonRadioButton r2 =newRadioButton();r2.Text ="Team Leader";r2.Location =newPoint(400, 40);r2.AutoSize =true;r2.BackColor = Color.LightSteelBlue;r2.Padding =newPadding(6, 6, 6, 6);// Adding this label to the formthis.Controls.Add(r2);}}}Producción:
Antes de configurar el relleno:

Después de configurar el relleno:

Publicación traducida automáticamente
Artículo escrito por ankita_saini y traducido por Barcelona Geeks. The original can be accessed here. Licence: CCBY-SA