La tarea es crear un formulario HTML dinámicamente con la ayuda de JavaScript. Hay dos enfoques que se analizan a continuación.
Enfoque 1: use document.createElement() para crear los nuevos elementos y use el método setAttribute() para establecer los atributos de los elementos. Agregue estos elementos al elemento <form> mediante el método appendChild() . Finalmente agregue el elemento <form> al elemento <body> del documento. Este ejemplo crea un formulario de registro.
- Ejemplo:
html
<!DOCTYPE html>
<html>
<head>
<title>
Create a Form Dynamically with
the JavaScript
</title>
</head>
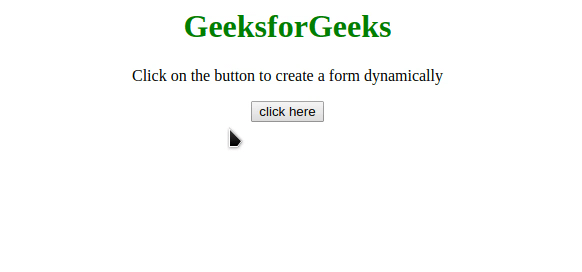
<body style="text-align: center;">
<h1 style="color: green;">
GeeksforGeeks
</h1>
<p>
Click on the button to create
a form dynamically
</p>
<button onClick="GFG_Fun()">
click here
</button>
<p id="GFG_DOWN"></p>
<script>
var down = document.getElementById("GFG_DOWN");
// Create a break line element
var br = document.createElement("br");
function GFG_Fun() {
// Create a form dynamically
var form = document.createElement("form");
form.setAttribute("method", "post");
form.setAttribute("action", "submit.php");
// Create an input element for Full Name
var FN = document.createElement("input");
FN.setAttribute("type", "text");
FN.setAttribute("name", "FullName");
FN.setAttribute("placeholder", "Full Name");
// Create an input element for date of birth
var DOB = document.createElement("input");
DOB.setAttribute("type", "text");
DOB.setAttribute("name", "dob");
DOB.setAttribute("placeholder", "DOB");
// Create an input element for emailID
var EID = document.createElement("input");
EID.setAttribute("type", "text");
EID.setAttribute("name", "emailID");
EID.setAttribute("placeholder", "E-Mail ID");
// Create an input element for password
var PWD = document.createElement("input");
PWD.setAttribute("type", "password");
PWD.setAttribute("name", "password");
PWD.setAttribute("placeholder", "Password");
// Create an input element for retype-password
var RPWD = document.createElement("input");
RPWD.setAttribute("type", "password");
RPWD.setAttribute("name", "reTypePassword");
RPWD.setAttribute("placeholder", "ReEnter Password");
// create a submit button
var s = document.createElement("input");
s.setAttribute("type", "submit");
s.setAttribute("value", "Submit");
// Append the full name input to the form
form.appendChild(FN);
// Inserting a line break
form.appendChild(br.cloneNode());
// Append the DOB to the form
form.appendChild(DOB);
form.appendChild(br.cloneNode());
// Append the emailID to the form
form.appendChild(EID);
form.appendChild(br.cloneNode());
// Append the Password to the form
form.appendChild(PWD);
form.appendChild(br.cloneNode());
// Append the ReEnterPassword to the form
form.appendChild(RPWD);
form.appendChild(br.cloneNode());
// Append the submit button to the form
form.appendChild(s);
document.getElementsByTagName("body")[0]
.appendChild(form);
}
</script>
</body>
</html>
- Producción:
Enfoque 2: este enfoque es algo similar al anterior pero usa el método JQuery para agregar los elementos. Use document.createElement() para crear los nuevos elementos y use el método setAttribute() para establecer los atributos de los elementos. Agregue estos elementos al elemento < form > mediante el método append() de JQuery. Finalmente agregue el elemento <form> al elemento <body> del documento. Este ejemplo crea un formulario de INICIO DE SESIÓN.
- Ejemplo:
html
<!DOCTYPE html>
<html>
    <head>
        <title>
            Create a Form Dynamically
            with the JavaScript
        </title>
    </head>
    <body style="text-align: center;">
        <h1 style="color: green;">
            GeeksforGeeks
        </h1>
        <p>
              Click on the button to create
            a form dynamically
        </p>
        <button onClick="GFG_Fun()">
            click here
        </button>
        <p id="GFG_DOWN"></p>
        <script>
            var down = document.getElementById("GFG_DOWN");
            function GFG_Fun() {

                // Create a form dynamically
                var form = document.createElement("form");
                form.setAttribute("method", "post");
                form.setAttribute("action", "submit.php");

                // Create an input element for emailID
                var ID = document.createElement("input");
                ID.setAttribute("type", "text");
                ID.setAttribute("name", "emailID");
                ID.setAttribute("placeholder", "E-Mail ID");

                // Create an input element for password
                var PWD = document.createElement("input");
                PWD.setAttribute("type", "password");
                PWD.setAttribute("name", "password");
                PWD.setAttribute("placeholder", "Password");

                // Create a submit button
                var s = document.createElement("input");
                s.setAttribute("type", "submit");
                s.setAttribute("value", "Submit");

                // Append the email_ID input to the form
                form.append(ID);

                // Append the password to the form
                form.append(PWD);

                // Append the button to the form
                form.append(s);

                document.getElementsByTagName("body")[0]
               .appendChild(form);
            }
        </script>
    </body>
</html>
- Producción:

JavaScript es mejor conocido por el desarrollo de páginas web, pero también se usa en una variedad de entornos que no son de navegador. Puede aprender JavaScript desde cero siguiendo este tutorial de JavaScript y ejemplos de JavaScript .
Publicación traducida automáticamente
Artículo escrito por PranchalKatiyar y traducido por Barcelona Geeks. The original can be accessed here. Licence: CCBY-SA