Las tablas se utilizan para mostrar un conjunto de datos. En algunos proyectos, debe implementar la tabla dinámica con modos editables/no editables donde un usuario puede agregar o eliminar cualquier fila. Además, Material UI para React tiene un componente de tabla personalizable disponible, y es muy fácil de integrar, pero no existe tal funcionalidad para manejar la adición y eliminación de filas individualmente. Usaremos React.js y Material UI e implementaremos estas funcionalidades en él.
Creación de la aplicación React e instalación del módulo:
-
Paso 1: Cree una aplicación React usando el siguiente comando.
npx create-react-app foldername
-
Paso 2: después de crear la carpeta de su proyecto, es decir, el nombre de la carpeta, muévase a ella con el siguiente comando.
cd foldername
- Paso 3: Después de crear la aplicación React.js, instale los módulos material-ui usando el siguiente comando.
npm install @material-ui/core
npm install @material-ui/icons
npm install @material-ui/lab
Estructura del proyecto por defecto: Tendrá el siguiente aspecto.
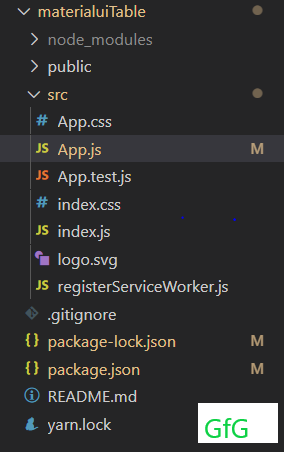
Estructura del proyecto inicial
Cambiando la Estructura del Proyecto: No necesitamos algunos archivos como App.css, logo.svg. Elimínelos y agregue un nuevo archivo TableDemo.js donde residirá nuestro componente de tabla.
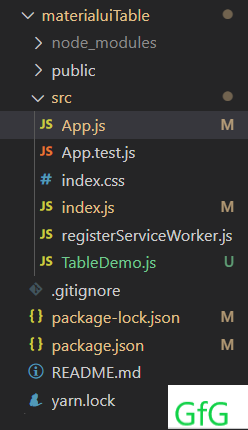
Cambiar la estructura del proyecto
Ejemplo: ahora escriba el siguiente código en los archivos App.js y TableDemo.js según corresponda. Aquí, la aplicación es nuestro componente predeterminado donde hemos reemplazado el código predeterminado.
App.js
import React from "react";
import TableDemo from "./TableDemo";

function App() {
    return (
        <div>
            {/* Header with inline css */}
            <h1
                style={{
                    display: 'flex', justifyContent: 'center', padding: '15px',
                    border: '13px solid #b4f0b4', color: 'rgb(11, 167, 11)'
                }}>
                Geeks For Geeks Material UI Table
            </h1>
            {/* Table component below header */}
            <TableDemo />
        </div>
    )
}

export default App;
TableDemo.js
import React, { useState } from "react";
import CreateIcon from "@material-ui/icons/Create";
import {
    Box, Button, Snackbar, Table,
    TableBody, TableCell, TableHead, TableRow
} from "@material-ui/core";
import DeleteOutlineIcon from "@material-ui/icons/DeleteOutline";
import AddBoxIcon from "@material-ui/icons/AddBox";
import DoneIcon from "@material-ui/icons/Done";
import ClearIcon from "@material-ui/icons/Clear";
import { makeStyles } from "@material-ui/core/styles";
import Alert from "@material-ui/lab/Alert";
import Dialog from "@material-ui/core/Dialog";
import DialogActions from "@material-ui/core/DialogActions";
import DialogContent from "@material-ui/core/DialogContent";
import DialogContentText from "@material-ui/core/DialogContentText";
import DialogTitle from "@material-ui/core/DialogTitle";

// Creating styles
const useStyles = makeStyles({
    root: {
        "& > *": {
            borderBottom: "unset",
        },
    },
    table: {
        minWidth: 650,
    },
    snackbar: {
        bottom: "104px",
    },
});

function TableDemo() {
    // Creating style object
    const classes = useStyles();

    // Defining a state named rows
    // which we can update by calling on setRows function
    const [rows, setRows] = useState([
        { id: 1, firstname: "", lastname: "", city: "" },
    ]);

    // Initial states
    const [open, setOpen] = React.useState(false);
    const [isEdit, setEdit] = React.useState(false);
    const [disable, setDisable] = React.useState(true);
    const [showConfirm, setShowConfirm] = React.useState(false);

    // Function For closing the alert snackbar
    const handleClose = (event, reason) => {
        if (reason === "clickaway") {
            return;
        }
        setOpen(false);
    };

    // Function For adding new row object
    const handleAdd = () => {
        setRows([
            ...rows,
            {
                id: rows.length + 1, firstname: "",
                lastname: "", city: ""
            },
        ]);
        setEdit(true);
    };

    // Function to handle edit
    const handleEdit = (i) => {
        // If edit mode is true setEdit will
        // set it to false and vice versa
        setEdit(!isEdit);
    };

    // Function to handle save
    const handleSave = () => {
        setEdit(!isEdit);
        setRows(rows);
        console.log("saved : ", rows);
        setDisable(true);
        setOpen(true);
    };

    // The handleInputChange handler can be set up to handle
    // many different inputs in the form, listen for changes
    // to input elements and record their values in state
    const handleInputChange = (e, index) => {
        setDisable(false);
        const { name, value } = e.target;
        const list = [...rows];
        list[index][name] = value;
        setRows(list);
    };

    // Showing delete confirmation to users
    const handleConfirm = () => {
        setShowConfirm(true);
    };

    // Handle the case of delete confirmation where
    // user click yes delete a specific row of id:i
    const handleRemoveClick = (i) => {
        const list = [...rows];
        list.splice(i, 1);
        setRows(list);
        setShowConfirm(false);
    };

    // Handle the case of delete confirmation
    // where user click no
    const handleNo = () => {
        setShowConfirm(false);
    };

  return (
    <TableBody>
      <Snackbar
        open={open}
        autoHideDuration={2000}
        onClose={handleClose}
        className={classes.snackbar}
      >
        <Alert onClose={handleClose} severity="success">
          Record saved successfully!
        </Alert>
      </Snackbar>
      <Box margin={1}>
        <div style={{ display: "flex", justifyContent: "space-between" }}>
          <div>
            {isEdit ? (
              <div>
                <Button onClick={handleAdd}>
                  <AddBoxIcon onClick={handleAdd} />
                  ADD
                </Button>
                {rows.length !== 0 && (
                  <div>
                    {disable ? (
                      <Button disabled align="right" onClick={handleSave}>
                        <DoneIcon />
                        SAVE
                      </Button>
                    ) : (
                      <Button align="right" onClick={handleSave}>
                        <DoneIcon />
                        SAVE
                      </Button>
                    )}
                  </div>
                )}
              </div>
            ) : (
              <div>
                <Button onClick={handleAdd}>
                  <AddBoxIcon onClick={handleAdd} />
                  ADD
                </Button>
                <Button align="right" onClick={handleEdit}>
                  <CreateIcon />
                  EDIT
                </Button>
              </div>
            )}
          </div>
        </div>
        <TableRow align="center"> </TableRow>

        <Table
          className={classes.table}
          size="small"
          aria-label="a dense table"
        >
          <TableHead>
            <TableRow>
              <TableCell>First Name</TableCell>
              <TableCell>Last Name</TableCell>
              <TableCell align="center">City</TableCell>
              <TableCell align="center"> </TableCell>
            </TableRow>
          </TableHead>
          <TableBody>
            {rows.map((row, i) => {
              return (
                <div>
                  <TableRow>
                    {isEdit ? (
                      <div>
                        <TableCell padding="none">
                          <input
                            value={row.firstname}
                            name="firstname"
                            onChange={(e) => handleInputChange(e, i)}
                          />
                        </TableCell>
                        <TableCell padding="none">
                          <input
                            value={row.lastname}
                            name="lastname"
                            onChange={(e) => handleInputChange(e, i)}
                          />
                        </TableCell>
                        <TableCell padding="none">
                          <select
                            style={{ width: "100px" }}
                            name="city"
                            value={row.city}
                            onChange={(e) => handleInputChange(e, i)}
                          >
                            <option value=""></option>
                            <option value="Karanja">Karanja</option>
                            <option value="Hingoli">Hingoli</option>
                            <option value="Bhandara">Bhandara</option>
                            <option value="Amaravati">Amaravati</option>
                            <option value="Pulgaon">Pulgaon</option>
                          </select>
                        </TableCell>
                      </div>
                    ) : (
                      <div>
                        <TableCell component="th" scope="row">
                          {row.firstname}
                        </TableCell>
                        <TableCell component="th" scope="row">
                          {row.lastname}
                        </TableCell>
                        <TableCell component="th" scope="row" align="center">
                          {row.city}
                        </TableCell>
                        <TableCell
                          component="th"
                          scope="row"
                          align="center"
                        ></TableCell>
                      </div>
                    )}
                    {isEdit ? (
                      <Button className="mr10" onClick={handleConfirm}>
                        <ClearIcon />
                      </Button>
                    ) : (
                      <Button className="mr10" onClick={handleConfirm}>
                        <DeleteOutlineIcon />
                      </Button>
                    )}
                    {showConfirm && (
                      <div>
                        <Dialog
                          open={showConfirm}
                          onClose={handleNo}
                          aria-labelledby="alert-dialog-title"
                          aria-describedby="alert-dialog-description"
                        >
                          <DialogTitle id="alert-dialog-title">
                            {"Confirm Delete"}
                          </DialogTitle>
                          <DialogContent>
                            <DialogContentText id="alert-dialog-description">
                              Are you sure to delete
                            </DialogContentText>
                          </DialogContent>
                          <DialogActions>
                            <Button
                              onClick={() => handleRemoveClick(i)}
                              color="primary"
                              autoFocus
                            >
                              Yes
                            </Button>
                            <Button
                              onClick={handleNo}
                              color="primary"
                              autoFocus
                            >
                              No
                            </Button>
                          </DialogActions>
                        </Dialog>
                      </div>
                    )}
                  </TableRow>
                </div>
              );
            })}
          </TableBody>
        </Table>
      </Box>
    </TableBody>
  );
}

export default TableDemo;
Paso para ejecutar la aplicación: Ejecute la aplicación usando el siguiente comando desde el directorio raíz del proyecto.
npm start
Salida: Ahora abra su navegador y vaya a http://localhost:3000/ , verá la siguiente salida.
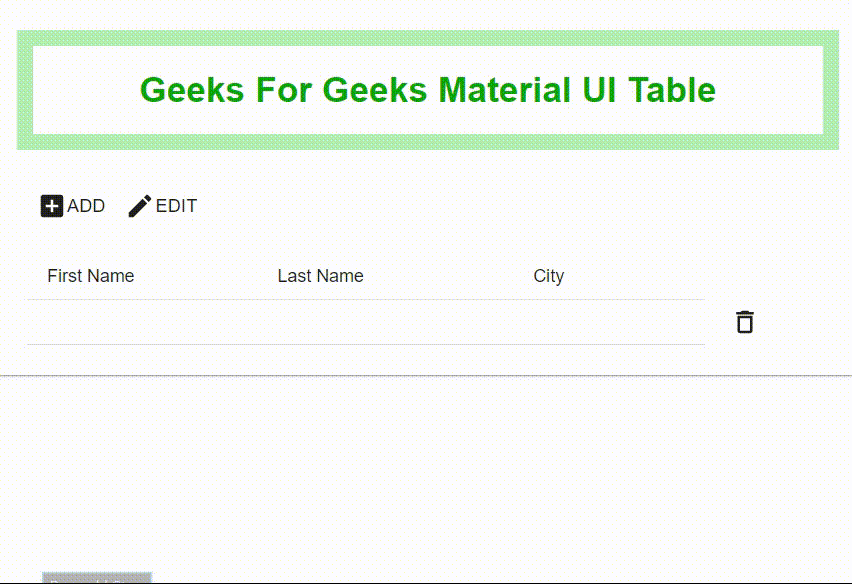
Demostración de funcionalidad de tabla
Explicación:
- useState() es un gancho en ReactJs que permite que un componente funcional tenga un estado. Pasamos el estado inicial en esta función, y nos devuelve una variable y una función para actualizar ese estado. Al usar esto, podemos manejar el modo de edición/no edición y los botones para que se muestren en consecuencia.
- Inicialmente, la tabla se mostrará en modo de no edición. Después de hacer clic en EDITAR, las filas de la tabla se modificarán en el modo de edición, donde el usuario puede agregar tantas filas como desee o eliminar cualquier fila.
- En el modo de edición, cuando el usuario intenta cambiar los datos de la fila, el botón EDITAR cambiará a GUARDAR. Después de hacer clic en GUARDAR, aparecerá un mensaje de alerta de guardado.
- Cuando un usuario intente eliminar una fila, se mostrará la confirmación de eliminación. Si el usuario selecciona sí , esa fila en particular se eliminará y si el usuario selecciona no , la fila no se eliminará.
- Observe el resultado anterior y observe los cambios. También puede modificar esos cambios según su elección.
Publicación traducida automáticamente
Artículo escrito por chaudharinikita9999 y traducido por Barcelona Geeks. The original can be accessed here. Licence: CCBY-SA