En este artículo, aprenderemos cómo crear animaciones dinámicas en nuestra página web utilizando los elementos de lienzo en HTML5. El objetivo principal de este elemento es crear gráficos desde cero o manipularlos . Se puede utilizar para manipular el lienzo mediante la API de JavaScript y crear animaciones y gráficos dinámicos que reaccionan a la interacción del usuario. La interfaz de usuario para aplicaciones web también se puede construir usándola.
Sintaxis:
<canvas id="myCanvas" width="500" height="500">
    ...
</canvas>
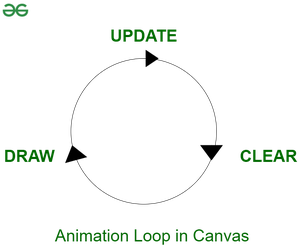
Podemos lograr una animación dinámica en HTML siguiendo los siguientes pasos uno a la vez:
Paso 1: Creación de bucle de animación:
let canvas = $("#myCanvas");
// Rendering 2-D canvas on webpage
let context = canvas.get(0).getContext("2d");
let Width = canvas.width();
let Height = canvas.height();
function animate() {
    // Creates endless loop by calling animate
    // function again in 35 milliseconds
    setTimeout(animate, 35);
};
animate(); // Calling the function animate

Paso 2: Lógica para manejar los botones para interactuar con la animación:
let playAnimation = true;
let startButton = $("#start");
let stopButton = $("#stop");
startButton.hide(); // Disabled Start button
startButton.click(() => {
   $(this).hide();
   stopButton.show();
   playAnimation = true;
   animate();
});
stopButton.click(() => {
   $(this).hide();
   startButton.show();
   playAnimation = false;
});
Paso 3: Seleccionar y aleatorizar formas:
let Shape = function (x, y, width, height) {
   this.x = x;
   // Define starting position of the shape
   this.y = y;
   // Define height and width of the shape
   this.width = width;
   this.height = height;
};

// To randomize the position and size of each shape
for (let i = 0; i < 5; i++) {
   let x = Math.random() * 200;
   let y = Math.random() * 200;
   let width = height = Math.random() * 50;
   shapes.push(new Shape(x, y, width, height));
};
context.fillRect(tmpShape.x, tmpShape.y,
                 tmpShape.width, tmpShape.height);
Paso 4: Cambiar de dirección:
tmpShape.x += 2; // Increment x co-ordinate by 2
tmpShape.y + // Increment y co-ordinate by 1
// For unpredictable patterns
tmpShape.x += Math.random() * 3 + 2;
tmpShape.y += Math.random() * 3 - 1;
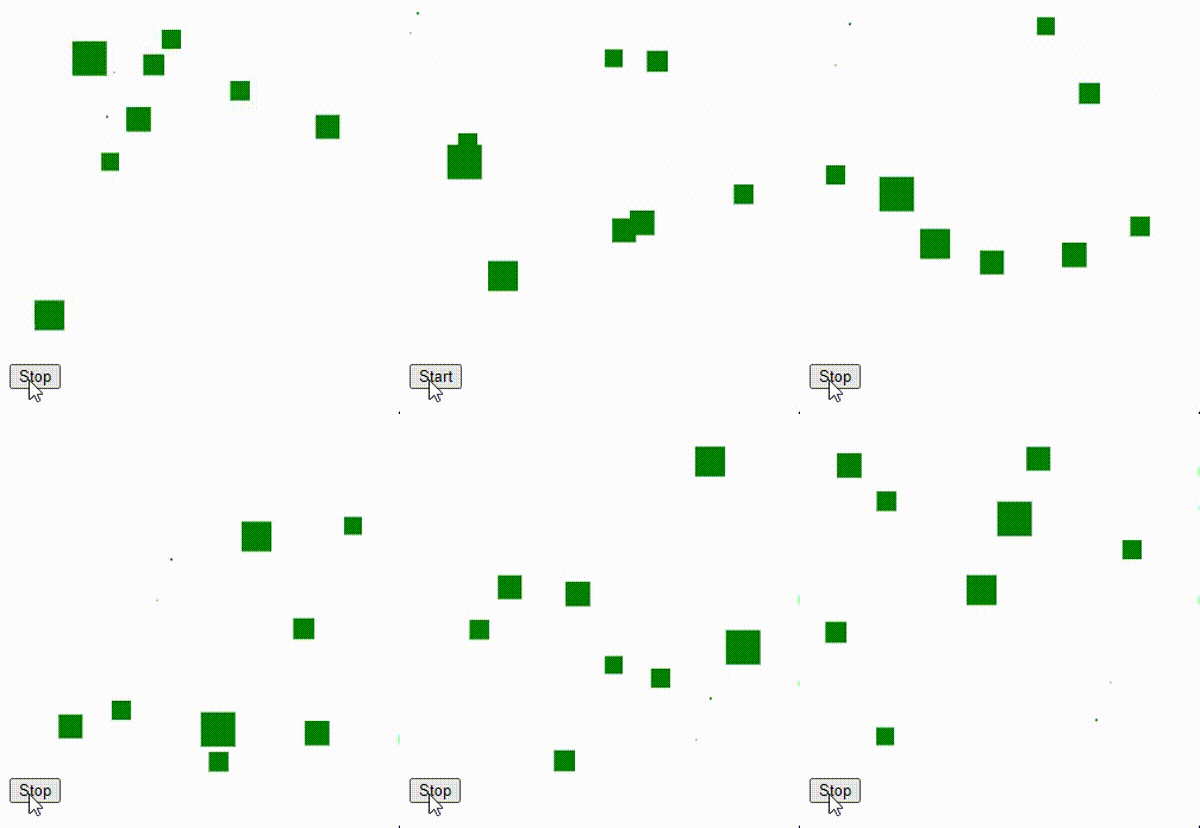
Los cuatro pasos anteriores constituyen la estructura básica para crear animaciones dinámicas en lienzo. De acuerdo con el requisito de animación requerido, necesitamos construir lógica y codificar la lógica en la función animate() . A continuación se muestra un ejemplo de rebote de objetos fuera de un límite de lienzo .
Ejemplo: Este es el ejemplo completo que ilustrará cómo dibujar animaciones dinámicas en HTML5.
HTML
<!DOCTYPE html>
<html>

<head>
    <title>How to Build Dynamic Graphics in HTML5</title>

    <script type="text/javascript" src=
"http://ajax.googleapis.com/ajax/libs/jquery/1/jquery.min.js">
    </script>
</head>

<body>
    <canvas width="300" height="300" id="Canvas">
    </canvas>

    <!-- Buttons to control the animation loop -->
    <div>
        <button id="start">Start</button>
        <button id="stop">Stop</button>
    </div>

    <script>
        let canvas = $("#Canvas");
        let context = canvas.get(0).getContext("2d");
        context.fillStyle = "green";

        // Width of the animation
        let Width = canvas.width();

        // Height of the animation
        let Height = canvas.height();
        let playAnimation = true;
        let startButton = $("#start");
        let stopButton = $("#stop");

        // Code to disable Start button
        startButton.hide();
        startButton.click(function () {
            $(this).hide();
            stopButton.show();
            playAnimation = true;
            animate();
        });

        // Code to disable Stop button
        stopButton.click(function () {
            $(this).hide();
            startButton.show();
            playAnimation = false;
        });

        // Code to define width and height of the shape
        let Shape = function (x, y, width, height) {
            this.x = x;
            this.y = y;
            this.width = width;
            this.height = height;

            // No reversal of direction in
            // the x-axis initially
            this.reverseX = false;
            this.reverseY = false;
        };

        // Code to generate ten random
        // shapes for animation loop
        let shapes = new Array();
        for (let i = 0; i < 10; i++) {
            let x = Math.random() * 300;
            let y = Math.random() * 300;
            let width = height = Math.random() * 30;

            // Adding random shapes to canvas
            shapes.push(new Shape(x, y, width, height));
        };
        function animate() {
            context.clearRect(0, 0, Width, Height);
            let shapesLength = shapes.length;
            for (let i = 0; i < shapesLength; i++) {
                let tmpshape = shapes[i];
                if (!tmpshape.reverseX) {

                    // Increment the x co-ordinate by 3 units
                    tmpshape.x += 3;
                } else {

                    // Decrement the x co-ordinate by 3 units
                    tmpshape.x -= 3;
                };
                if (!tmpshape.reverseY) {

                    // Increment the y co-ordinate by 3 units
                    tmpshape.y += 3;
                } else {

                    // Decrement the y co-ordinate by 3 units
                    tmpshape.y -= 3;
                };

                // Code for shapes to bounce off the boundary
                context.fillRect(tmpshape.x, tmpshape.y,
                    tmpshape.width, tmpshape.height);
                if (tmpshape.x < 0) {
                    tmpshape.reverseX = false;
                } else if (tmpshape.x + tmpshape.width > Width) {

                    // Reverse the direction of shape if position of
                    // shape is greater than width of canvas
                    tmpshape.reverseX = true;
                };
                if (tmpshape.y < 0) {
                    tmpshape.reverseY = false;
                } else if (tmpshape.y + tmpshape.height > Height) {

                    // Reverse the direction of shape if position of
                    // shape is greater than height of canvas
                    tmpshape.reverseY = true;
                };
            };
            if (playAnimation) {
                setTimeout(animate, 35);

            };  // Runs animate() function infinitely
            // after every 35ms
        };
        animate();
    </script>
</body>

</html>
Producción:

Hacer rebotar objetos en un límite del lienzo
Navegadores compatibles:
- Google Chrome
- explorador de Internet
- Firefox
- Ópera
- Safari
Publicación traducida automáticamente
Artículo escrito por priddheshinternship y traducido por Barcelona Geeks. The original can be accessed here. Licence: CCBY-SA