En los artículos anteriores, hemos visto tres operaciones CRUD, como las operaciones de creación , lectura y actualización en nuestra aplicación de Android. En este artículo, veremos cómo agregar la operación de eliminación para eliminar nuestros elementos almacenados en la base de datos SQLite .
¿Qué vamos a construir en este artículo?
Construiremos una aplicación simple en la que eliminaremos el curso de nuestra base de datos SQLite en nuestra aplicación de Android. qué
Implementación paso a paso
Paso 1: Actualizar nuestra clase DBHandler
Como tenemos que eliminar datos de nuestra base de datos SQLite. Para eso, tenemos que crear un método para eliminar nuestros datos de la base de datos SQLite. app > java > el nombre del paquete de tu aplicación > DBHandler
Java
// below is the method for deleting our course.
public void deleteCourse(String courseName) {

        // on below line we are creating
        // a variable to write our database.
        SQLiteDatabase db = this.getWritableDatabase();

        // on below line we are calling a method to delete our
        // course and we are comparing it with our course name.
        db.delete(TABLE_NAME, "name=?", new String[]{courseName});
        db.close();
}
DBHandler.java
Java
import android.content.ContentValues;
import android.content.Context;
import android.database.Cursor;
import android.database.sqlite.SQLiteDatabase;
import android.database.sqlite.SQLiteOpenHelper;

import java.util.ArrayList;

public class DBHandler extends SQLiteOpenHelper {

    // creating a constant variables for our database.
    // below variable is for our database name.
    private static final String DB_NAME = "coursedb";

    // below int is our database version
    private static final int DB_VERSION = 1;

    // below variable is for our table name.
    private static final String TABLE_NAME = "mycourses";

    // below variable is for our id column.
    private static final String ID_COL = "id";

    // below variable is for our course name column
    private static final String NAME_COL = "name";

    // below variable id for our course duration column.
    private static final String DURATION_COL = "duration";

    // below variable for our course description column.
    private static final String DESCRIPTION_COL = "description";

    // below variable is for our course tracks column.
    private static final String TRACKS_COL = "tracks";

    // creating a constructor for our database handler.
    public DBHandler(Context context) {
        super(context, DB_NAME, null, DB_VERSION);
    }

    // below method is for creating a database by running a sqlite query
    @Override
    public void onCreate(SQLiteDatabase db) {
        // on below line we are creating
        // an sqlite query and we are
        // setting our column names
        // along with their data types.
        String query = "CREATE TABLE " + TABLE_NAME + " ("
                + ID_COL + " INTEGER PRIMARY KEY AUTOINCREMENT, "
                + NAME_COL + " TEXT,"
                + DURATION_COL + " TEXT,"
                + DESCRIPTION_COL + " TEXT,"
                + TRACKS_COL + " TEXT)";

        // at last we are calling a exec sql
        // method to execute above sql query
        db.execSQL(query);
    }

    // this method is use to add new course to our sqlite database.
    public void addNewCourse(String courseName, String courseDuration, String courseDescription, String courseTracks) {

        // on below line we are creating a variable for
        // our sqlite database and calling writable method
        // as we are writing data in our database.
        SQLiteDatabase db = this.getWritableDatabase();

        // on below line we are creating a
        // variable for content values.
        ContentValues values = new ContentValues();

        // on below line we are passing all values
        // along with its key and value pair.
        values.put(NAME_COL, courseName);
        values.put(DURATION_COL, courseDuration);
        values.put(DESCRIPTION_COL, courseDescription);
        values.put(TRACKS_COL, courseTracks);

        // after adding all values we are passing
        // content values to our table.
        db.insert(TABLE_NAME, null, values);

        // at last we are closing our
        // database after adding database.
        db.close();
    }

    // we have created a new method for reading all the courses.
    public ArrayList<CourseModal> readCourses() {
        // on below line we are creating a
        // database for reading our database.
        SQLiteDatabase db = this.getReadableDatabase();

        // on below line we are creating a cursor with query to read data from database.
        Cursor cursorCourses = db.rawQuery("SELECT * FROM " + TABLE_NAME, null);

        // on below line we are creating a new array list.
        ArrayList<CourseModal> courseModalArrayList = new ArrayList<>();

        // moving our cursor to first position.
        if (cursorCourses.moveToFirst()) {
            do {
                // on below line we are adding the data from cursor to our array list.
                courseModalArrayList.add(new CourseModal(cursorCourses.getString(1),
                        cursorCourses.getString(4),
                        cursorCourses.getString(2),
                        cursorCourses.getString(3)));
            } while (cursorCourses.moveToNext());
            // moving our cursor to next.
        }
        // at last closing our cursor
        // and returning our array list.
        cursorCourses.close();
        return courseModalArrayList;
    }

    // below is the method for updating our courses
    public void updateCourse(String originalCourseName, String courseName, String courseDescription,
                             String courseTracks, String courseDuration) {

        // calling a method to get writable database.
        SQLiteDatabase db = this.getWritableDatabase();
        ContentValues values = new ContentValues();

        // on below line we are passing all values
        // along with its key and value pair.
        values.put(NAME_COL, courseName);
        values.put(DURATION_COL, courseDuration);
        values.put(DESCRIPTION_COL, courseDescription);
        values.put(TRACKS_COL, courseTracks);

        // on below line we are calling a update method to update our database and passing our values.
        // and we are comparing it with name of our course which is stored in original name variable.
        db.update(TABLE_NAME, values, "name=?", new String[]{originalCourseName});
        db.close();
    }

    // below is the method for deleting our course.
    public void deleteCourse(String courseName) {

        // on below line we are creating
        // a variable to write our database.
        SQLiteDatabase db = this.getWritableDatabase();

        // on below line we are calling a method to delete our
        // course and we are comparing it with our course name.
        db.delete(TABLE_NAME, "name=?", new String[]{courseName});
        db.close();
    }

    @Override
    public void onUpgrade(SQLiteDatabase db, int oldVersion, int newVersion) {
        // this method is called to check if the table exists already.
        db.execSQL("DROP TABLE IF EXISTS " + TABLE_NAME);
        onCreate(db);
    }
}
Paso 2: Agregar un botón para eliminar nuestro curso
Vaya a la aplicación > res > diseño > archivo activity_update_course.xml y agregue un botón dentro de este diseño para eliminar un curso. A continuación se muestra el código para ese archivo.
XML
<!--button for deleting our course-->
<Button
  android:id="@+id/idBtnDelete"
  android:layout_width="match_parent"
  android:layout_height="wrap_content"
  android:layout_margin="10dp"
  android:text="Delete Course"
  android:textAllCaps="false" />
actividad_actualización_curso.xml
XML
<?xml version="1.0" encoding="utf-8"?>
<LinearLayout
    xmlns:android="http://schemas.android.com/apk/res/android"
    xmlns:tools="http://schemas.android.com/tools"
    android:layout_width="match_parent"
    android:layout_height="match_parent"
    android:orientation="vertical"
    tools:context=".UpdateCourseActivity">

    <!--Edit text to enter course name-->
    <EditText
        android:id="@+id/idEdtCourseName"
        android:layout_width="match_parent"
        android:layout_height="wrap_content"
        android:layout_margin="10dp"
        android:hint="Enter course Name" />

    <!--edit text to enter course duration-->
    <EditText
        android:id="@+id/idEdtCourseDuration"
        android:layout_width="match_parent"
        android:layout_height="wrap_content"
        android:layout_margin="10dp"
        android:hint="Enter Course Duration" />

    <!--edit text to display course tracks-->
    <EditText
        android:id="@+id/idEdtCourseTracks"
        android:layout_width="match_parent"
        android:layout_height="wrap_content"
        android:layout_margin="10dp"
        android:hint="Enter Course Tracks" />

    <!--edit text for course description-->
    <EditText
        android:id="@+id/idEdtCourseDescription"
        android:layout_width="match_parent"
        android:layout_height="wrap_content"
        android:layout_margin="10dp"
        android:hint="Enter Course Description" />

    <!--button for updating our course-->
    <Button
        android:id="@+id/idBtnUpdateCourse"
        android:layout_width="match_parent"
        android:layout_height="wrap_content"
        android:layout_margin="10dp"
        android:text="Update Course"
        android:textAllCaps="false" />

    <!--button for deleting our course-->
    <Button
        android:id="@+id/idBtnDelete"
        android:layout_width="match_parent"
        android:layout_height="wrap_content"
        android:layout_margin="10dp"
        android:text="Delete Course"
        android:textAllCaps="false" />

</LinearLayout>
Paso 3: Inicializar nuestro botón para eliminar nuestro curso
Vaya a la aplicación > java > el nombre del paquete de su aplicación > archivo UpdateCourseActivity.java y agréguele el siguiente código.
Java
// adding on click listener for delete button to delete our course.
deleteCourseBtn.setOnClickListener(new View.OnClickListener() {
            @Override
            public void onClick(View v) {
                // calling a method to delete our course.
                dbHandler.deleteCourse(courseName);
                Toast.makeText(UpdateCourseActivity.this, "Deleted the course", Toast.LENGTH_SHORT).show();
                Intent i = new Intent(UpdateCourseActivity.this, MainActivity.class);
                startActivity(i);
       }
});
UpdateCourseActivity.java
Java
import android.content.Intent;
import android.os.Bundle;
import android.view.View;
import android.widget.Button;
import android.widget.EditText;
import android.widget.Toast;

import androidx.appcompat.app.AppCompatActivity;

public class UpdateCourseActivity extends AppCompatActivity {

    // variables for our edit text, button, strings and dbhandler class.
    private EditText courseNameEdt, courseTracksEdt, courseDurationEdt, courseDescriptionEdt;
    private Button updateCourseBtn, deleteCourseBtn;
    private DBHandler dbHandler;
    String courseName, courseDesc, courseDuration, courseTracks;

    @Override
    protected void onCreate(Bundle savedInstanceState) {
        super.onCreate(savedInstanceState);
        setContentView(R.layout.activity_update_course);

        // initializing all our variables.
        courseNameEdt = findViewById(R.id.idEdtCourseName);
        courseTracksEdt = findViewById(R.id.idEdtCourseTracks);
        courseDurationEdt = findViewById(R.id.idEdtCourseDuration);
        courseDescriptionEdt = findViewById(R.id.idEdtCourseDescription);
        updateCourseBtn = findViewById(R.id.idBtnUpdateCourse);
        deleteCourseBtn = findViewById(R.id.idBtnDelete);

        // on below line we are initialing our dbhandler class.
        dbHandler = new DBHandler(UpdateCourseActivity.this);

        // on below lines we are getting data which
        // we passed in our adapter class.
        courseName = getIntent().getStringExtra("name");
        courseDesc = getIntent().getStringExtra("description");
        courseDuration = getIntent().getStringExtra("duration");
        courseTracks = getIntent().getStringExtra("tracks");

        // setting data to edit text
        // of our update activity.
        courseNameEdt.setText(courseName);
        courseDescriptionEdt.setText(courseDesc);
        courseTracksEdt.setText(courseTracks);
        courseDurationEdt.setText(courseDuration);

        // adding on click listener to our update course button.
        updateCourseBtn.setOnClickListener(new View.OnClickListener() {
            @Override
            public void onClick(View v) {

                // inside this method we are calling an update course
                // method and passing all our edit text values.
                dbHandler.updateCourse(courseName, courseNameEdt.getText().toString(), courseDescriptionEdt.getText().toString(), courseTracksEdt.getText().toString(), courseDurationEdt.getText().toString());

                // displaying a toast message that our course has been updated.
                Toast.makeText(UpdateCourseActivity.this, "Course Updated..", Toast.LENGTH_SHORT).show();

                // launching our main activity.
                Intent i = new Intent(UpdateCourseActivity.this, MainActivity.class);
                startActivity(i);
            }
        });

        // adding on click listener for delete button to delete our course.
        deleteCourseBtn.setOnClickListener(new View.OnClickListener() {
            @Override
            public void onClick(View v) {
                // calling a method to delete our course.
                dbHandler.deleteCourse(courseName);
                Toast.makeText(UpdateCourseActivity.this, "Deleted the course", Toast.LENGTH_SHORT).show();
                Intent i = new Intent(UpdateCourseActivity.this, MainActivity.class);
                startActivity(i);
            }
        });
    }
}
Ahora ejecute su aplicación y vea el resultado de la aplicación. Asegúrese de agregar datos a nuestra base de datos antes de eliminarlos.
Producción:
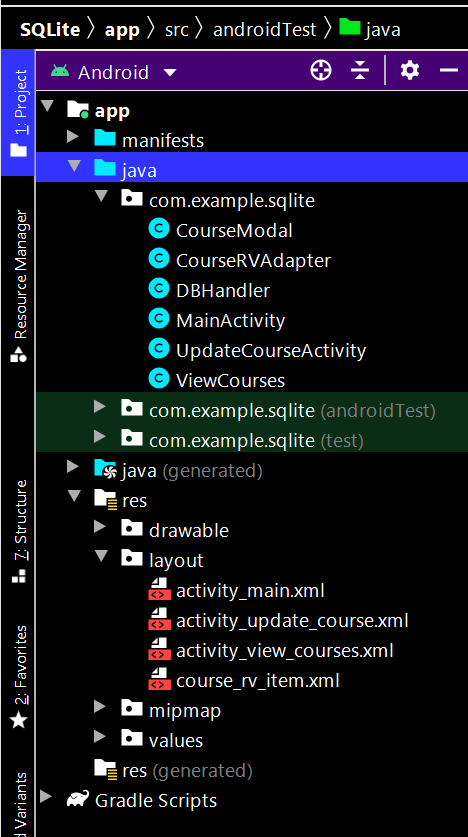
A continuación se muestra la estructura completa del archivo del proyecto después de realizar la operación de eliminación:
Publicación traducida automáticamente
Artículo escrito por chaitanyamunje y traducido por Barcelona Geeks. The original can be accessed here. Licence: CCBY-SA