Este programa de Python le permitirá detectar movimiento y también almacenar el intervalo de tiempo del movimiento.
Requisito:
- Python3
- OpenCV (bibliotecas)
- Pandas (bibliotecas)
Requisitos de instalación: instale Python3 , instale las bibliotecas Pandas y OpenCV .
Lógica principal: los videos se pueden tratar como una pila de imágenes llamadas marcos. Aquí estoy comparando diferentes fotogramas (imágenes) con el primer fotograma que debería ser estático (inicialmente sin movimientos). Comparamos dos imágenes comparando el valor de intensidad de cada píxel. En python podemos hacerlo fácilmente como puedes ver en el siguiente código:
Python3
# Python program to implement
# Webcam Motion Detector

# importing OpenCV, time and Pandas library
import cv2, time, pandas
# importing datetime class from datetime library
from datetime import datetime

# Assigning our static_back to None
static_back = None

# List when any moving object appear
motion_list = [ None, None ]

# Time of movement
time = []

# Initializing DataFrame, one column is start
# time and other column is end time
df = pandas.DataFrame(columns = ["Start", "End"])

# Capturing video
video = cv2.VideoCapture(0)

# Infinite while loop to treat stack of image as video
while True:
    # Reading frame(image) from video
    check, frame = video.read()

    # Initializing motion = 0(no motion)
    motion = 0

    # Converting color image to gray_scale image
    gray = cv2.cvtColor(frame, cv2.COLOR_BGR2GRAY)

    # Converting gray scale image to GaussianBlur
    # so that change can be find easily
    gray = cv2.GaussianBlur(gray, (21, 21), 0)

    # In first iteration we assign the value
    # of static_back to our first frame
    if static_back is None:
        static_back = gray
        continue

    # Difference between static background
    # and current frame(which is GaussianBlur)
    diff_frame = cv2.absdiff(static_back, gray)

    # If change in between static background and
    # current frame is greater than 30 it will show white color(255)
    thresh_frame = cv2.threshold(diff_frame, 30, 255, cv2.THRESH_BINARY)[1]
    thresh_frame = cv2.dilate(thresh_frame, None, iterations = 2)

    # Finding contour of moving object
    cnts,_ = cv2.findContours(thresh_frame.copy(),
                       cv2.RETR_EXTERNAL, cv2.CHAIN_APPROX_SIMPLE)

    for contour in cnts:
        if cv2.contourArea(contour) < 10000:
            continue
        motion = 1

        (x, y, w, h) = cv2.boundingRect(contour)
        # making green rectangle around the moving object
        cv2.rectangle(frame, (x, y), (x + w, y + h), (0, 255, 0), 3)

    # Appending status of motion
    motion_list.append(motion)

    motion_list = motion_list[-2:]

    # Appending Start time of motion
    if motion_list[-1] == 1 and motion_list[-2] == 0:
        time.append(datetime.now())

    # Appending End time of motion
    if motion_list[-1] == 0 and motion_list[-2] == 1:
        time.append(datetime.now())

    # Displaying image in gray_scale
    cv2.imshow("Gray Frame", gray)

    # Displaying the difference in currentframe to
    # the staticframe(very first_frame)
    cv2.imshow("Difference Frame", diff_frame)

    # Displaying the black and white image in which if
    # intensity difference greater than 30 it will appear white
    cv2.imshow("Threshold Frame", thresh_frame)

    # Displaying color frame with contour of motion of object
    cv2.imshow("Color Frame", frame)

    key = cv2.waitKey(1)
    # if q entered whole process will stop
    if key == ord('q'):
        # if something is movingthen it append the end time of movement
        if motion == 1:
            time.append(datetime.now())
        break

# Appending time of motion in DataFrame
for i in range(0, len(time), 2):
    df = df.append({"Start":time[i], "End":time[i + 1]}, ignore_index = True)

# Creating a CSV file in which time of movements will be saved
df.to_csv("Time_of_movements.csv")

video.release()

# Destroying all the windows
cv2.destroyAllWindows()
Análisis de todas las ventanas
Después de ejecutar el código, aparecerán 4 nuevas ventanas en la pantalla. Vamos a analizarlo uno por uno:
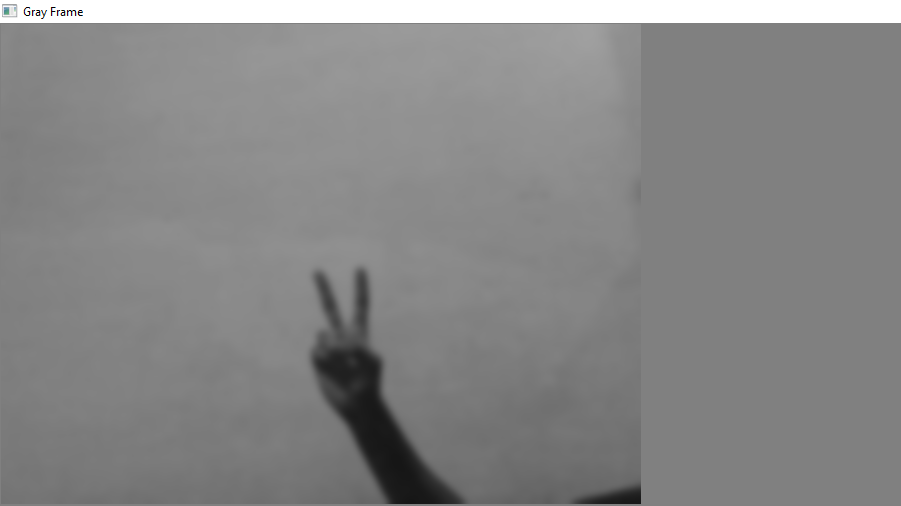
1. Marco gris: en el marco gris, la imagen está un poco borrosa y en escala de grises lo hicimos porque, en las imágenes grises solo hay un valor de intensidad, mientras que en la imagen RGB (rojo, verde y azul) hay tres valores de intensidad. Entonces sería fácil calcular la diferencia de intensidad en escala de grises.

2. Cuadro de diferencia: el cuadro de diferencia muestra la diferencia de intensidades del primer cuadro con el cuadro actual.

3. Marco de umbral: si la diferencia de intensidad para un píxel en particular es superior a 30 (en mi caso), ese píxel será blanco y si la diferencia es inferior a 30, ese píxel será negro.

4. Marco de color: en este marco, puede ver las imágenes en color en un marco de color junto con el contorno verde alrededor de los objetos en movimiento.

Tiempo Registro de movimientos
El archivo Time_of_movements se almacenará en la carpeta donde se almacena su archivo de código. Este archivo tendrá la extensión csv. En este archivo se registrará la hora de inicio del movimiento y la hora de finalización del movimiento. Como se puede ver en la imagen:

Demostración en vídeo
Publicación traducida automáticamente
Artículo escrito por ujjwal sharma 1 y traducido por Barcelona Geeks. The original can be accessed here. Licence: CCBY-SA