OpenCV es una biblioteca de software de aprendizaje automático y visión artificial de código abierto. Con su ayuda, se pueden realizar varias operaciones de procesamiento de imágenes, como manipular imágenes y aplicar toneladas de filtros. Se usa ampliamente en la detección de objetos, detección de rostros y otras tareas de procesamiento de imágenes.
Veamos cómo dibujar una forma rectangular en la imagen y extraer los objetos usando OpenCV.
# Python program to extract rectangular
# Shape using OpenCV in Python3
import cv2
import numpy as np

drawing = False     # true if mouse is pressed
mode = True         # if True, draw rectangle.
ix, iy = -1, -1

# mouse callback function
def draw_circle(event, x, y, flags, param):
    global ix, iy, drawing, mode

    if event == cv2.EVENT_LBUTTONDOWN:
        drawing = True
        ix, iy = x, y

    elif event == cv2.EVENT_MOUSEMOVE:
        if drawing == True:
            if mode == True:
                cv2.rectangle(img, (ix, iy), (x, y), (0, 255, 0), 3)
                a = x
                b = y
                if a != x | b != y:
                    cv2.rectangle(img, (ix, iy), (x, y), (0, 0, 0), -1)
            else:
                cv2.circle(img, (x, y), 5, (0, 0, 255), -1)

    elif event == cv2.EVENT_LBUTTONUP:
        drawing = False
        if mode == True:
            cv2.rectangle(img, (ix, iy), (x, y), (0, 255, 0), 2)

        else:
            cv2.circle(img, (x, y), 5, (0, 0, 255), -1)

img = np.zeros((512, 512, 3), np.uint8)
cv2.namedWindow('image')
cv2.setMouseCallback('image', draw_circle)

while(1):
    cv2.imshow('image', img)
    k = cv2.waitKey(1) & 0xFF
    if k == ord('m'):
        mode = not mode
    elif k == 27:
        break

cv2.destroyAllWindows()
Producción:
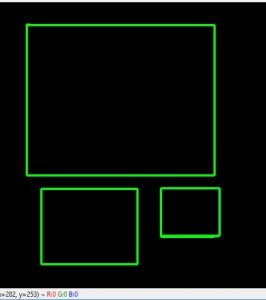
El fragmento de código anterior funcionará solo con una imagen de fondo negra. Pero los rectángulos se pueden dibujar en cualquier imagen. Podemos escribir un programa que nos permita seleccionar la parte deseada en una imagen y extraer esa parte seleccionada también. La tarea incluye las siguientes cosas:
- dibujar forma en cualquier imagen
- Vuelva a seleccionar la parte del extracto en caso de que haya una mala selección.
- extraer un objeto particular de la imagen
# Write Python code here
# import the necessary packages
import cv2
import argparse

# now let's initialize the list of reference point
ref_point = []
crop = False

def shape_selection(event, x, y, flags, param):
    # grab references to the global variables
    global ref_point, crop

    # if the left mouse button was clicked, record the starting
    # (x, y) coordinates and indicate that cropping is being performed
    if event == cv2.EVENT_LBUTTONDOWN:
        ref_point = [(x, y)]

    # check to see if the left mouse button was released
    elif event == cv2.EVENT_LBUTTONUP:
        # record the ending (x, y) coordinates and indicate that
        # the cropping operation is finished
        ref_point.append((x, y))

        # draw a rectangle around the region of interest
        cv2.rectangle(image, ref_point[0], ref_point[1], (0, 255, 0), 2)
        cv2.imshow("image", image)


# construct the argument parser and parse the arguments
ap = argparse.ArgumentParser()
ap.add_argument("-i", "--image", required = True, help ="Path to the image")
args = vars(ap.parse_args())

# load the image, clone it, and setup the mouse callback function
image = cv2.imread(args["image"])
clone = image.copy()
cv2.namedWindow("image")
cv2.setMouseCallback("image", shape_selection)


# keep looping until the 'q' key is pressed
while True:
    # display the image and wait for a keypress
    cv2.imshow("image", image)
    key = cv2.waitKey(1) & 0xFF

    # press 'r' to reset the window
    if key == ord("r"):
        image = clone.copy()

    # if the 'c' key is pressed, break from the loop
    elif key == ord("c"):
        break

if len(ref_point) == 2:
    crop_img = clone[ref_point[0][1]:ref_point[1][1], ref_point[0][0]:
                                                           ref_point[1][0]]
    cv2.imshow("crop_img", crop_img)
    cv2.waitKey(0)

# close all open windows
cv2.destroyAllWindows()
Ejecutar : guarde el archivo como capture_events.py y, para realizar pruebas, seleccione una imagen de demostración que se encuentra en el mismo directorio. Ahora, ejecute el siguiente comando –
python capture_events.py --image demo.jpg
Salida : primero seleccione la parte deseada de la imagen. Además, podemos eliminar la mala selección presionando ‘r’ según lo programado para hacer una nueva selección adecuada.
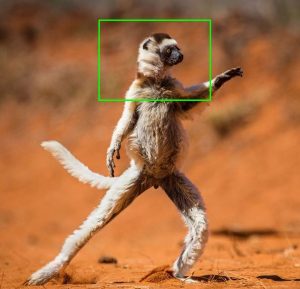
Higo: Porción Seleccionada
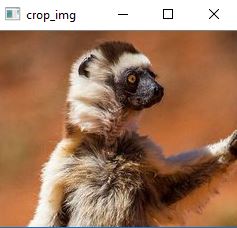
Ahora, después de seleccionar una selección adecuada como la anterior, simplemente presione ‘c’ para extraer, según lo programado.
Higo: Porción cortada