La función ribbon.target() en D3.js se usa para establecer el acceso de destino a la función especificada y devuelve este generador de cinta.
Sintaxis:
ribbon.target([target]);
Parámetros: esta función acepta un solo parámetro como se mencionó anteriormente y se describe a continuación:
- target: este parámetro es la función para establecer el descriptor de acceso de destino.
Valor de retorno: esta función devuelve el generador de cintas.
Los siguientes programas ilustran la función ribbon.target() en D3.js
Ejemplo 1:
HTML
<!DOCTYPE html>
<html>
<head>
  <meta charset="utf-8">
  <script
      src="https://d3js.org/d3.v4.js">
  </script>
</head>
<body>
  <center>
    <h1 style="color:green;">GeeksForGeeks</h1>
    <h3>D3.js | ribbon.target() Function</h3>
    <div id="GFG"></div>
    <script>
      // Create the svg area
      var svg = d3.select("#GFG")
          .append("svg")
          .attr("width", 300)
          .attr("height", 300)
          .append("g")
          .attr("transform", "translate(150,150)")

      // Create input data
      var data = [[148, 60, 71, 34, 5, 1],
                  [ 10, 80, 80, 12, 34, 53],
                  [175, 16, 68, 0 , 0, 3],
                  [13, 9, 69, 76, 35, 4],
                  [51, 60, 71, 34, 5, 1],
                  [ 10, 80, 80, 12, 34, 53]];

      // Give this matrix to d3.chord()
      var chords = d3.chord()(data)

      var ribbon = d3.ribbon().radius(140);

      // Use of ribbon.target() function
      ribbon({
        source: {startAngle: 0.7524114,
                  endAngle: 1.1212972},
        target: {startAngle: 1.8617078,
                   endAngle: 1.9842927}
      });
      svg.datum(chords)
         .append("g")
         .selectAll("path")
         .data(function (d) { return d; })
         .enter()
         .append("path")
         .attr("d", ribbon)
         .style("fill", "#aba7c9")
         .style("stroke", "black");
    </script>
  </center>
</body>
</html>
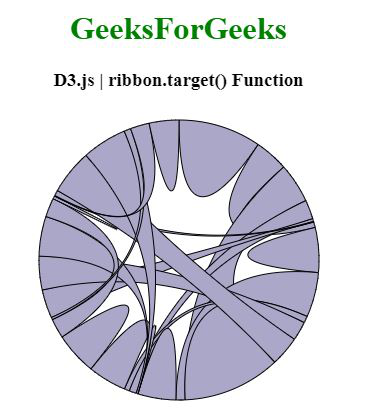
Producción:
Ejemplo 2:
HTML
<!DOCTYPE html>
<html>
<head>
  <meta charset="utf-8">
  <script src=
"https://cdnjs.cloudflare.com/ajax/libs/d3/4.2.2/d3.min.js">
  </script>
  <script src=
      "https://d3js.org/d3-color.v1.min.js">
  </script>
  <script src=
      "https://d3js.org/d3-scale-chromatic.v1.min.js">
  </script>
</head>
<body>
  <center>
    <h1 style="color:green;">GeeksForGeeks</h1>
    <h3>D3.js | ribbon.target() Function</h3>
    <div id="GFG"></div>
    <script>
      // Create the svg area
      var svg = d3.select("#GFG")
          .append("svg")
          .attr("width", 320)
          .attr("height", 320)
          .append("g")
          .attr("transform", "translate(160,160)")

      // Create input data
      var data = [[0,  58, 71, 89, 16, 28, 68],
                  [ 19, 51, 0, 20, 60, 61, 71],
                  [ 80, 10, 16, 145, 0, 80, 45],
                  [ 10, 13,  9, 90,  94, 0, 0]];

      // 4 groups, so create a vector of 4 colors
      var colors = [d3.schemeSet1[0], d3.schemeSet1[1],
                    d3.schemeSet1[2], d3.schemeSet1[3],
                    d3.schemeSet1[4], d3.schemeSet1[5],
                    d3.schemeSet1[6], d3.schemeSet1[7]];

      // Give this matrix to d3.chord()
      var chords = d3.chord()(data)

      var rib = d3.ribbon().radius(150);

      // Use of ribbon.target() function
      rib({
        source: {startAngle: 0.7, endAngle: 1.2},
        target: {startAngle: 1.6, endAngle: 1.9}
      });

      svg.datum(chords)
          .append("g")
          .selectAll("path")
          .data(function (d) { return d; })
          .enter()
          .append("path")
          .attr("d", rib)
          .style("fill", function (d) {
              return (colors[d.source.index])
          })
          .style("stroke", "black");
    </script>
  </center>
</body>
</html>
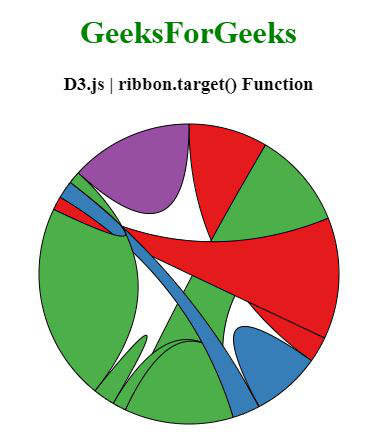
Producción:
Publicación traducida automáticamente
Artículo escrito por SHUBHAMSINGH10 y traducido por Barcelona Geeks. The original can be accessed here. Licence: CCBY-SA

