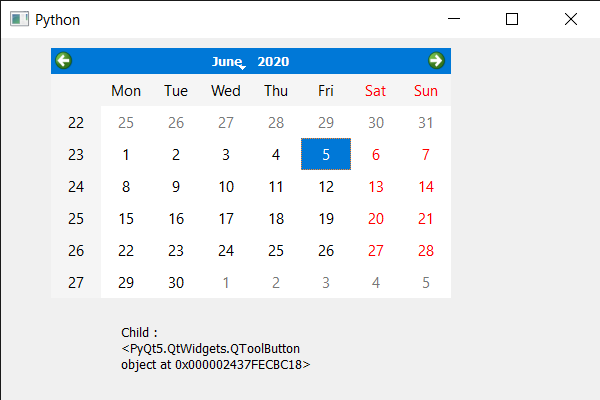
En este artículo veremos cómo obtenemos el hijo de QCalendarWidget en la coordenada/posición dada. El calendario no es solo un widget único, es una mezcla de muchos widgets más pequeños a los que nos referimos como hijo del calendario. Hay muchos elementos secundarios, como vista de tabla, delegado de elementos, etc.
Para hacer esto, usaremos el método childAt con el objeto QCalendarWidget.
Sintaxis: calendar.childAt(x, y)
Argumento: toma dos enteros como argumento
Retorno: devuelve el hijo del calendario en la posición dada
A continuación se muestra la implementación.
Python3
# importing libraries
from PyQt5.QtWidgets import *
from PyQt5 import QtCore, QtGui
from PyQt5.QtGui import *
from PyQt5.QtCore import *
import sys


class Window(QMainWindow):

    def __init__(self):
        super().__init__()

        # setting title
        self.setWindowTitle("Python ")

        # setting geometry
        self.setGeometry(100, 100, 600, 400)

        # calling method
        self.UiComponents()

        # showing all the widgets
        self.show()

    # method for components
    def UiComponents(self):

        # creating a QCalendarWidget object
        self.calendar = QCalendarWidget(self)

        # setting geometry to the calendar
        self.calendar.setGeometry(50, 10, 400, 250)

        # creating a label
        label = QLabel(self)

        # setting geometry
        label.setGeometry(120, 280, 200, 60)

        # making it multi line
        label.setWordWrap(True)

        # getting child at position 10, 10
        value = self.calendar.childAt(10, 10)

        # setting text to the label
        label.setText("Child : " + str(value))


# create pyqt5 app
App = QApplication(sys.argv)

# create the instance of our Window
window = Window()


# start the app
sys.exit(App.exec())
Producción :

Publicación traducida automáticamente
Artículo escrito por rakshitarora y traducido por Barcelona Geeks. The original can be accessed here. Licence: CCBY-SA