Kivy es una herramienta GUI independiente de la plataforma en Python. Como se puede ejecutar en Android, IOS, Linux y Windows, etc. Básicamente se usa para desarrollar la aplicación de Android, pero eso no significa que no se pueda usar en aplicaciones de escritorio.
????????? Tutorial de Kivy: aprenda Kivy con ejemplos .
Botón de activación:
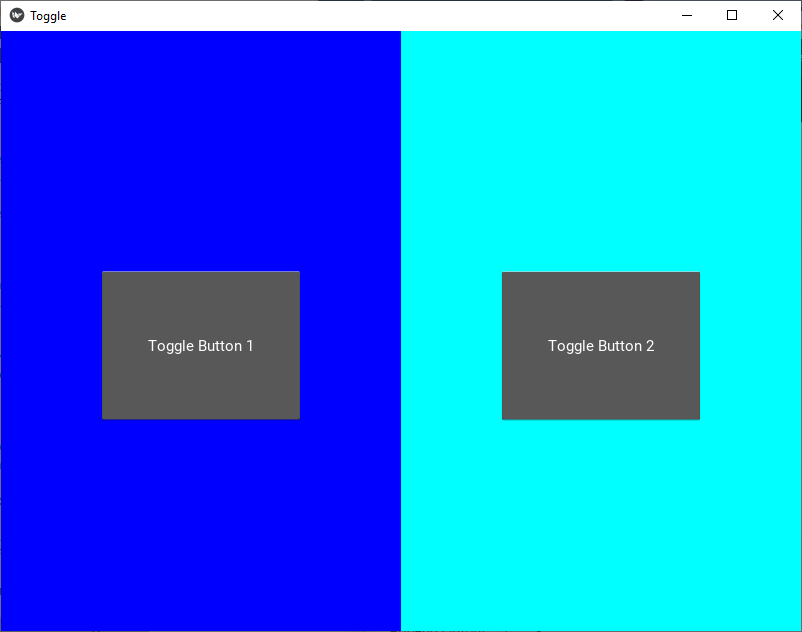
El widget ToggleButton actúa como una casilla de verificación. Cuando lo toca o hace clic en él, el estado cambia entre ‘normal’ y ‘abajo’ (a diferencia de un botón que solo está ‘abajo’ mientras está presionado).
Los botones de alternar también se pueden agrupar para crear botones de radio: solo un botón en un grupo puede estar en un estado ‘abajo’. El nombre del grupo puede ser una string o cualquier otro objeto de Python que se pueda modificar:
btn1 = ToggleButton(text='Male', group='sex', )
btn2 = ToggleButton(text='Female', group='sex', state='down')
btn3 = ToggleButton(text='Mixed', group='sex')
Solo uno de los botones puede estar ‘abajo’/marcado al mismo tiempo. Para configurar el ToggleButton, puede usar las mismas propiedades que puede usar para una clase Button.
Basic Approach:

1) import kivy
2) import kivyApp
3) import toggle button
4) import Gridlayout
5) Set minimum version(optional)
6) create layout class
7) create App class
8) create the, kv file
9) return Layout/widget/Class(according to requirement)
10) Run an instance of the class
Implementación del Enfoque:
código .py:
Python3
# Program to explain how to use Toggle button in kivy

# import kivy module
import kivy

# base Class of your App inherits from the App class.
# app:always refers to the instance of your application
from kivy.app import App

# this restrict the kivy version i.e
# below this kivy version you cannot
# use the app or software
kivy.require('1.9.0')

# The ToggleButton widget acts like a checkbox.
# To use this you must have to import it.
from kivy.uix.togglebutton import ToggleButton

# The GridLayout arranges children in a matrix.
# It takes the available space and divides it
# into columns and rows, then adds
# widgets to the resulting “cells”.
from kivy.uix.gridlayout import GridLayout


# Create the Layout Class
class Toggle_btn(GridLayout):
    pass

# Create the App Class
class ToggleApp(App):
    def build(self):
        return Toggle_btn()

# Run the App
if __name__=='__main__':
   ToggleApp().run()
código .kv:
Python3
# .kv file implementation of the code

<Toggle_btn>:

    # Columns divides screen in two parts
    cols:2

    # Create Toggle button 1
    RelativeLayout:
        canvas:
            Color:
                rgb: 0, 0, 1
            Rectangle:
                size: root.width, root.height
        ToggleButton:
            size_hint: None, None
            size: 0.25 * root.width, 0.25 * root.height
            pos: 0.125 * root.width, 0.350 * root.height
            text: 'Toggle Button 1'
            group: 'geometry'

   # Create Toggle button 2
    RelativeLayout:
        canvas:
            Color:
                rgb: 0, 1, 1
            Rectangle:
                size: root.width, root.height
        ToggleButton:
            size_hint: None, None
            size: 0.25 * root.width, 0.25 * root.height
            pos: 0.125 * root.width, 0.350 * root.height
            text: 'Toggle Button 2'
            group: 'geometry'
Producción:

Publicación traducida automáticamente
Artículo escrito por YashKhandelwal8 y traducido por Barcelona Geeks. The original can be accessed here. Licence: CCBY-SA