Kivy es una herramienta GUI independiente de la plataforma en Python. Como se puede ejecutar en Android, IOS, Linux y Windows, etc. Básicamente se usa para desarrollar la aplicación de Android, pero eso no significa que no se pueda usar en aplicaciones de escritorio.
Entrada de texto:
El widget TextInput proporciona un cuadro para texto sin formato editable. Se admiten las funciones Unicode, multilínea, navegación con cursor, selección y portapapeles.
TextInput utiliza dos sistemas de coordenadas diferentes:
- (x, y): coordenadas en píxeles, que se utilizan principalmente para renderizar en pantalla.
- (fila, columna) – índice del cursor en caracteres/líneas, utilizado para la selección y el movimiento del cursor.
Basic Approach:

1) import kivy
2) import kivyApp
3) import widget
4) import Relativelayout
5) import textinput
6) Set minimum version(optional)
7) Create Widget class
8) Create App class
9) create .kv file (name same as the app class):
        1) create textinput
10) return Layout/widget/Class(according to requirement)
11) Run an instance of the class
Implementación del Enfoque
# archivo principal.py
Python3
# Program to Show how to use textinput
# (UX widget) in kivy using .kv file

# import kivy module
import kivy

# base Class of your App inherits from the App class.
# app:always refers to the instance of your application
from kivy.app import App

# this restrict the kivy version i.e
# below this kivy version you cannot
# use the app or software
kivy.require('1.9.0')

# Widgets are elements
# of a graphical user interface
# that form part of the User Experience.
from kivy.uix.widget import Widget

# The TextInput widget provides a
# box for editable plain text
from kivy.uix.textinput import TextInput

# This layout allows you to set relative coordinates for children.
from kivy.uix.relativelayout import RelativeLayout

# Create the widget class
class textinp(Widget):
    pass

# Create the app class
class MainApp(App):

    # Building text input
    def build(self):
        return textinp()

    # Arranging that what you write will be shown to you
    # in IDLE
    def process(self):
        text = self.root.ids.input.text
        print(text)

# Run the App
if __name__ == "__main__":
    MainApp().run()
# archivo main.kv
Python3
# .kv file implementation of the code

<textinp>:
    title: 'InputDialog'
    auto_dismiss: False
    id: test1

    # Using relative layout to arrange properly
    RelativeLayout:
        orientation: 'vertical'
        pos: self.pos
        size: root.size
        id: test2

        # Defining text input in .kv
        # And giving it the look . pos and features
        TextInput:
            id: input
            hint_text:'Enter text'
            pos_hint: {'center_x': 0.5, 'center_y': 0.705}
            size_hint: 0.95, 0.5
            on_text: app.process()
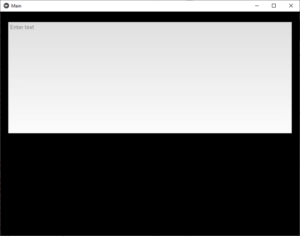
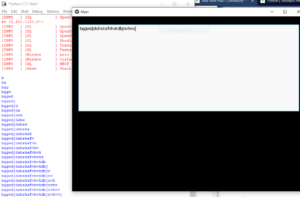
Producción:
Cuando ejecutes la aplicación verás:
Después de algunas entradas verás:
Publicación traducida automáticamente
Artículo escrito por YashKhandelwal8 y traducido por Barcelona Geeks. The original can be accessed here. Licence: CCBY-SA