Requisitos previos:
- Fundamentos de desarrollo de aplicaciones de Android para principiantes
- Guía para instalar y configurar Android Studio
- android | ¿Cómo crear/comenzar un nuevo proyecto en Android Studio?
- android | Ejecutando tu primera aplicación de Android
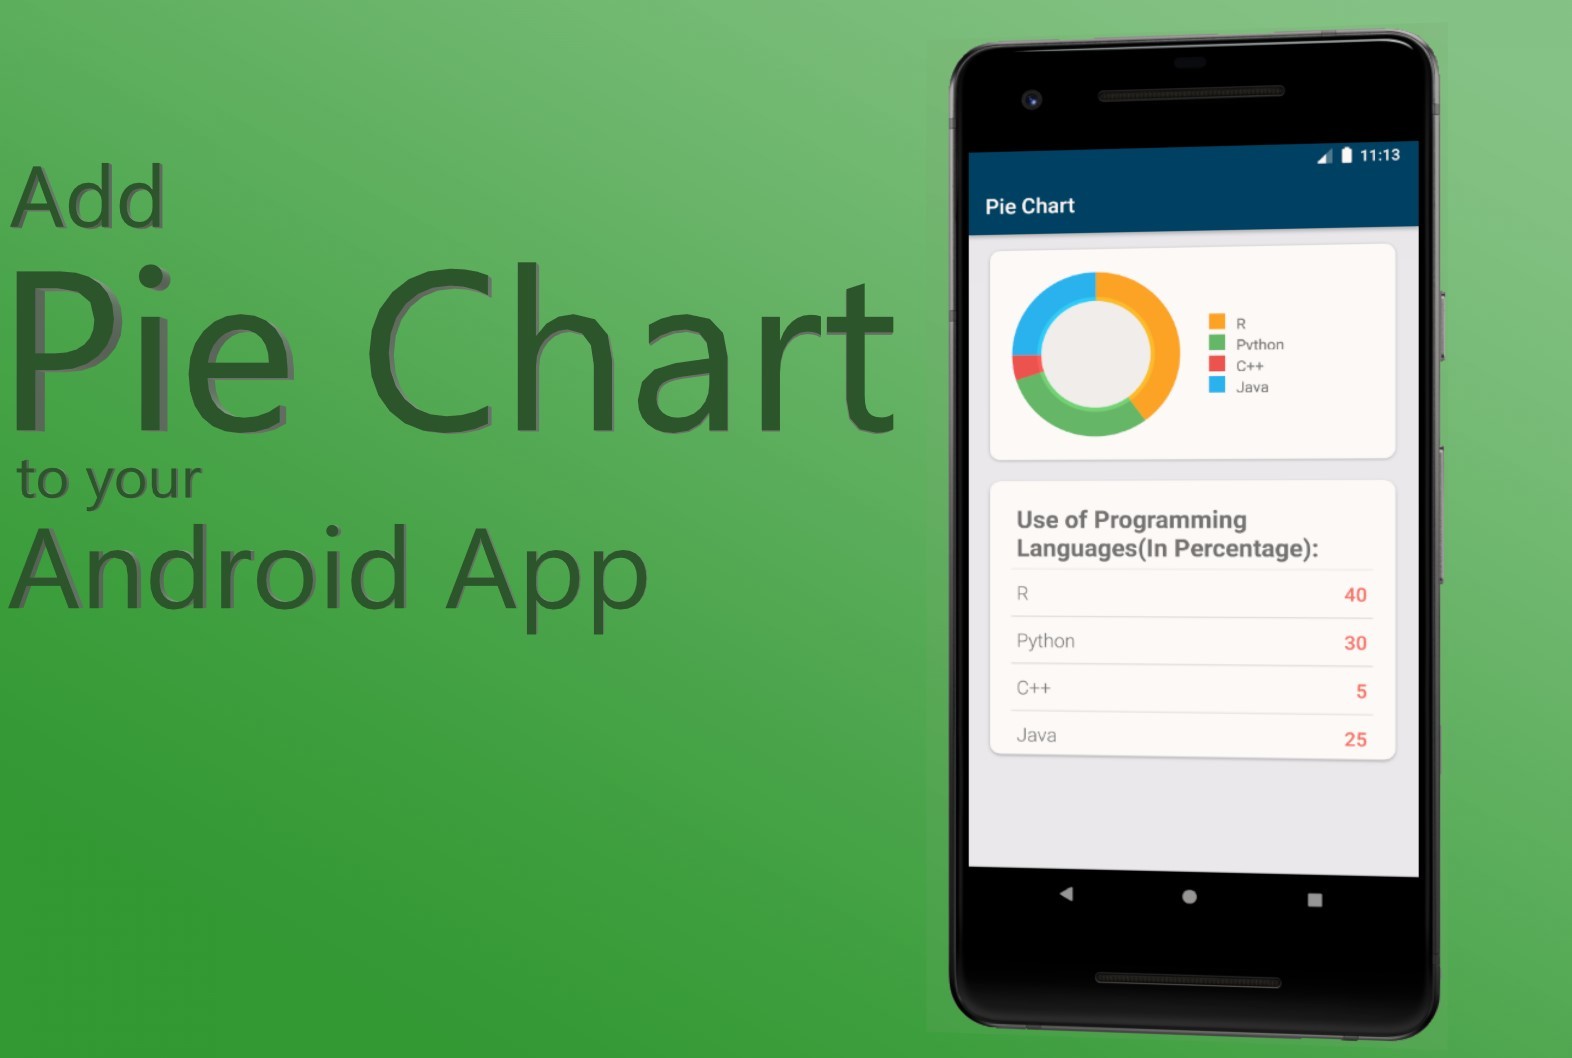
Un gráfico circular es un gráfico estadístico circular, que se divide en porciones para ilustrar proporciones numéricas. Representa un gráfico especial que utiliza «porciones circulares», donde cada sector muestra los tamaños relativos de los datos. Un gráfico circular se corta en forma de radios en segmentos que describen frecuencias relativas o magnitudes, también conocido como gráfico circular. Un gráfico circular representa números en porcentajes, y la suma total de todos los segmentos debe ser igual al 100 %.
Entonces, veamos los pasos para agregar un gráfico circular en una aplicación de Android.
- Paso 1: Abrir un nuevo proyecto
- Abra un nuevo proyecto simplemente haga clic en la opción Archivo en la esquina superior izquierda.
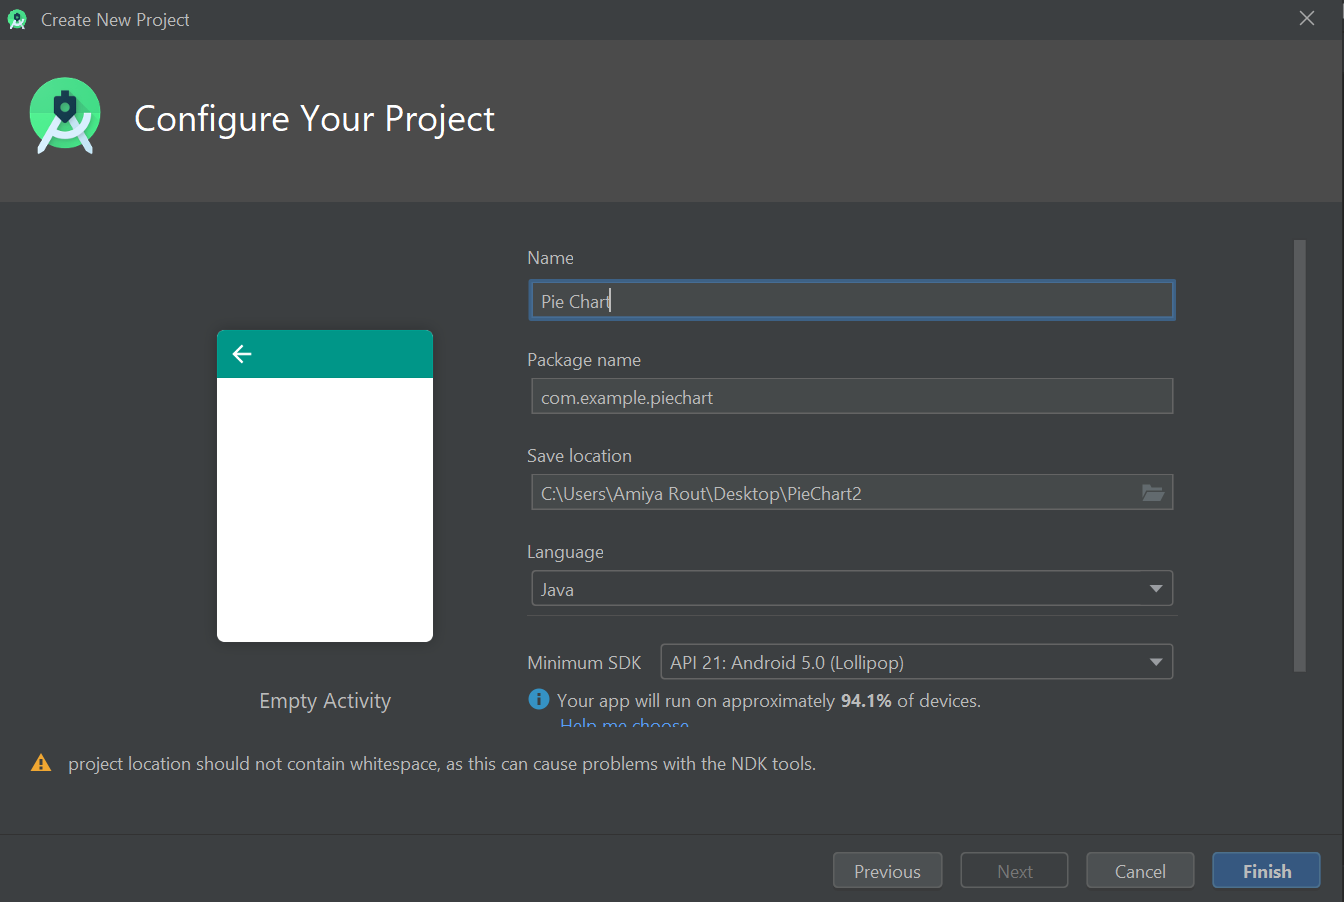
- Luego haga clic en nuevo y abra un nuevo proyecto con el nombre que desee.
- Ahora vamos a trabajar en Actividad vacía con lenguaje como Java. Deje todas las demás opciones intactas.
- Puede cambiar el nombre del proyecto según su elección.

- De forma predeterminada, habrá dos archivos activity_main.xml y MainActivity.java .
- Paso 2: antes de ir a la sección de codificación, primero debe realizar una tarea previa.
- Vaya a la sección app->res->values->colors.xml y configure los colores para su aplicación.
colores.xml
<?xmlversion="1.0"encoding="utf-8"?><resources><colorname="colorPrimary">#024265</color><colorname="colorPrimaryDark">#024265</color><colorname="colorAccent">#05af9b</color><colorname="color_one">#fb7268</color><colorname="color_white">#ededf2</color><colorname="color_two">#E3E0E0</color><colorname="R">#FFA726</color><colorname="Python">#66BB6A</color><colorname="CPP">#EF5350</color><colorname="Java">#29B6F6</color></resources> - Vaya a la sección Gradle Scripts->build.gradle (Módulo: aplicación) e importe las siguientes dependencias y haga clic en «sincronizar ahora» en la ventana emergente anterior.
build.gradle (:aplicación)
// For Card viewimplementation 'androidx.cardview:cardview:1.0.0'// Chart and graph libraryimplementation 'com.github.blackfizz:eazegraph:1.2.5l@aar'implementation 'com.nineoldandroids:library:2.4.0'
- Vaya a la sección app->res->values->colors.xml y configure los colores para su aplicación.
- Paso 3: Diseño de la interfaz de usuario
- A continuación se muestra el código para el archivo xml.
actividad_principal.xml
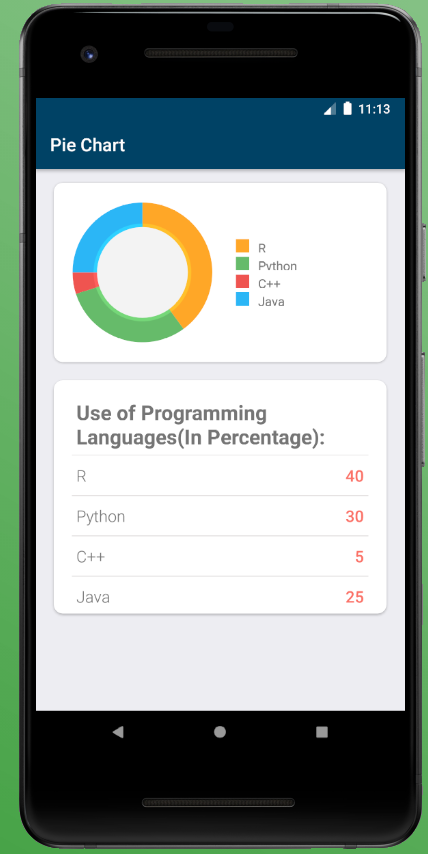
<?xmlversion="1.0"encoding="utf-8"?><RelativeLayoutandroid:layout_width="match_parent"android:layout_height="match_parent"android:background="@color/color_white"tools:context=".MainActivity"><!-- Card view for displaying the ---><!-- Pie chart and details of pie chart --><androidx.cardview.widget.CardViewandroid:id="@+id/cardViewGraph"android:layout_width="match_parent"android:layout_height="200dp"android:layout_marginLeft="20dp"android:layout_marginRight="20dp"android:layout_marginTop="15dp"android:elevation="10dp"app:cardCornerRadius="10dp"><!--Linear layout to display pie chart ---><!-- and details of pie chart--><LinearLayoutandroid:layout_width="match_parent"android:layout_height="match_parent"android:orientation="horizontal"android:weightSum="2"><!--Pie chart to display the data--><org.eazegraph.lib.charts.PieChartandroid:id="@+id/piechart"android:layout_width="0dp"android:layout_height="match_parent"android:padding="6dp"android:layout_weight="1"android:layout_marginTop="15dp"android:layout_marginLeft="15dp"android:layout_marginBottom="15dp"/><!--Creating another linear layout ---><!-- to display pie chart details --><LinearLayoutandroid:layout_width="0dp"android:layout_height="match_parent"android:layout_weight="1"android:layout_marginLeft="20dp"android:orientation="vertical"android:gravity="center_vertical"><LinearLayoutandroid:layout_width="match_parent"android:layout_height="15dp"android:layout_gravity="center_vertical"><!--View to display the yellow color icon--><Viewandroid:layout_width="15dp"android:layout_height="match_parent"android:background="@color/R"/><!--Text view to display R --><TextViewandroid:layout_width="wrap_content"android:layout_height="wrap_content"android:text="R"android:paddingLeft="10dp"/></LinearLayout><!--Linear layout to display Python--><LinearLayoutandroid:layout_width="match_parent"android:layout_height="15dp"android:layout_gravity="center_vertical"android:layout_marginTop="5dp"><!--View to display the green color icon--><Viewandroid:layout_width="15dp"android:layout_height="match_parent"android:background="@color/Python"/><!--Text view to display python text --><TextViewandroid:layout_width="wrap_content"android:layout_height="wrap_content"android:text="Python"android:paddingLeft="10dp"/></LinearLayout><!--Linear layout to display C++--><LinearLayoutandroid:layout_width="match_parent"android:layout_height="15dp"android:layout_gravity="center_vertical"android:layout_marginTop="5dp"><!--View to display the red color icon--><Viewandroid:layout_width="15dp"android:layout_height="match_parent"android:background="@color/CPP"/><!--Text view to display C++ text --><TextViewandroid:layout_width="wrap_content"android:layout_height="wrap_content"android:text="C++"android:paddingLeft="10dp"/></LinearLayout><!--Linear layout to display Java--><LinearLayoutandroid:layout_width="match_parent"android:layout_height="15dp"android:layout_gravity="center_vertical"android:layout_marginTop="5dp"><!--View to display the blue color icon--><Viewandroid:layout_width="15dp"android:layout_height="match_parent"android:background="@color/Java"/><!--Text view to display Java text --><TextViewandroid:layout_width="wrap_content"android:layout_height="wrap_content"android:text="Java"android:paddingLeft="10dp"/></LinearLayout></LinearLayout></LinearLayout></androidx.cardview.widget.CardView><!-- Another Card view for displaying ---><!-- Use of programming languages --><androidx.cardview.widget.CardViewandroid:layout_width="match_parent"android:layout_height="260dp"android:layout_below="@+id/cardViewGraph"android:layout_marginLeft="20dp"android:layout_marginRight="20dp"android:layout_marginTop="20dp"android:layout_marginBottom="20dp"android:elevation="10dp"app:cardCornerRadius="10dp"android:id="@+id/details"><!--Relative layout to display ---><!-- use of programming languages --><LinearLayoutandroid:layout_width="match_parent"android:layout_height="wrap_content"android:orientation="vertical"><!--Text view to use of ---><!-- programming languages text--><TextViewandroid:layout_width="match_parent"android:layout_height="wrap_content"android:text="Use of Programming Languages(In Percentage):"android:textSize="23sp"android:textStyle="bold"android:layout_marginLeft="25dp"android:layout_marginTop="20dp"/><!--View to display the line--><Viewandroid:layout_width="match_parent"android:layout_height="1dp"android:background="@color/color_two"android:layout_marginLeft="20dp"android:layout_marginRight="20dp"android:layout_marginTop="5dp"/><RelativeLayoutandroid:layout_width="match_parent"android:layout_height="wrap_content"android:layout_marginRight="25dp"android:layout_marginLeft="25dp"android:layout_marginTop="10dp"android:layout_marginBottom="10dp"><!--Text view to display R --><TextViewandroid:layout_width="wrap_content"android:layout_height="wrap_content"android:fontFamily="sans-serif-light"android:text="R"android:textSize="18sp"/><!--Text view to display the ---><!-- percentage of programming language ---><!-- used. For now default set to 0--><TextViewandroid:layout_width="fill_parent"android:layout_height="wrap_content"android:text="0"android:id="@+id/tvR"android:textAlignment="textEnd"android:textSize="18sp"android:textColor="@color/color_one"android:textStyle="bold"android:fontFamily="sans-serif-light"android:layout_alignParentRight="true"/></RelativeLayout><!--View to display the line--><Viewandroid:layout_width="match_parent"android:layout_height="1dp"android:background="@color/color_two"android:layout_marginLeft="20dp"android:layout_marginRight="20dp"/><RelativeLayoutandroid:layout_width="match_parent"android:layout_height="wrap_content"android:layout_marginRight="25dp"android:layout_marginLeft="25dp"android:layout_marginTop="10dp"android:layout_marginBottom="10dp"><TextViewandroid:layout_width="wrap_content"android:layout_height="wrap_content"android:fontFamily="sans-serif-light"android:text="Python"android:textSize="18sp"/><!--Text view to display the percentage ---><!-- of programming language used. ---><!-- For now default set to 0--><TextViewandroid:layout_width="fill_parent"android:layout_height="wrap_content"android:text="0"android:id="@+id/tvPython"android:textAlignment="textEnd"android:textSize="18sp"android:textColor="@color/color_one"android:textStyle="bold"android:fontFamily="sans-serif-light"android:layout_alignParentRight="true"/></RelativeLayout><Viewandroid:layout_width="match_parent"android:layout_height="1dp"android:background="@color/color_two"android:layout_marginLeft="20dp"android:layout_marginRight="20dp"/><RelativeLayoutandroid:layout_width="match_parent"android:layout_height="wrap_content"android:layout_marginRight="25dp"android:layout_marginLeft="25dp"android:layout_marginTop="10dp"android:layout_marginBottom="10dp"><TextViewandroid:layout_width="wrap_content"android:layout_height="wrap_content"android:fontFamily="sans-serif-light"android:text="C++"android:textSize="18sp"/><!--Text view to display the percentage ---><!-- of programming language used. ---><!-- For now default set to 0--><TextViewandroid:layout_width="fill_parent"android:layout_height="wrap_content"android:text="0"android:id="@+id/tvCPP"android:textAlignment="textEnd"android:textSize="18sp"android:textColor="@color/color_one"android:textStyle="bold"android:fontFamily="sans-serif-light"android:layout_alignParentRight="true"/></RelativeLayout><Viewandroid:layout_width="match_parent"android:layout_height="1dp"android:background="@color/color_two"android:layout_marginLeft="20dp"android:layout_marginRight="20dp"/><RelativeLayoutandroid:layout_width="match_parent"android:layout_height="wrap_content"android:layout_marginRight="25dp"android:layout_marginLeft="25dp"android:layout_marginTop="10dp"android:layout_marginBottom="10dp"><TextViewandroid:layout_width="wrap_content"android:layout_height="wrap_content"android:fontFamily="sans-serif-light"android:text="Java"android:textSize="18sp"/><!--Text view to display the percentage ---><!-- of programming language used. ---><!-- For now default set to 0--><TextViewandroid:layout_width="fill_parent"android:layout_height="wrap_content"android:text="0"android:id="@+id/tvJava"android:textAlignment="textEnd"android:textSize="18sp"android:textColor="@color/color_one"android:textStyle="bold"android:fontFamily="sans-serif-light"android:layout_alignParentRight="true"/></RelativeLayout></LinearLayout></androidx.cardview.widget.CardView></RelativeLayout> - Después de usar este código en el archivo .xml , la interfaz de usuario será como:
- A continuación se muestra el código para el archivo xml.
- Paso 4: trabajar con el archivo Java
- Abra el archivo MainActivity.java allí dentro de la clase, primero cree el objeto de la clase TextView y la clase de gráfico circular.
// Create the object of TextView and PieChart classTextView tvR, tvPython, tvCPP, tvJava;PieChart pieChart; - En segundo lugar, dentro
onCreate()del método, tenemos que vincular esos objetos con sus respectivos ID que hemos dado en el archivo .XML.// Link those objects with their respective// id's that we have given in .XML filetvR = findViewById(R.id.tvR);tvPython = findViewById(R.id.tvPython);tvCPP = findViewById(R.id.tvCPP);tvJava = findViewById(R.id.tvJava);pieChart = findViewById(R.id.piechart); - Cree un
private void setData()método fuera delonCreate()método y defínalo. - Dentro
setData()del método, la tarea más importante va a suceder, es decir, cómo configuramos los datos en el archivo de texto y también en el gráfico circular. setData()En primer lugar , el método interno establece el porcentaje de idioma utilizado en su vista de texto respectiva.// Set the percentage of language usedtvR.setText(Integer.toString(40));tvPython.setText(Integer.toString(30));tvCPP.setText(Integer.toString(5));tvJava.setText(Integer.toString(25));- Y luego configure estos datos en el gráfico circular y también configure sus respectivos colores usando el
addPieSlice()método.// Set the data and color to the pie chartpieChart.addPieSlice(newPieModel("R",Integer.parseInt(tvR.getText().toString()),Color.parseColor("#FFA726")));pieChart.addPieSlice(newPieModel("Python",Integer.parseInt(tvPython.getText().toString()),Color.parseColor("#66BB6A")));pieChart.addPieSlice(newPieModel("C++",Integer.parseInt(tvCPP.getText().toString()),Color.parseColor("#EF5350")));pieChart.addPieSlice(newPieModel("Java",Integer.parseInt(tvJava.getText().toString()),Color.parseColor("#29B6F6"))); - Para una mejor apariencia, anime el gráfico circular usando
startAnimation().// To animate the pie chartpieChart.startAnimation(); - Por último, invoque el
setData()método dentro delonCreate()método.
A continuación se muestra el código completo del archivo MainActivity.java:
MainActivity.java
packagecom.example.piechart;// Import the required librariesimportandroidx.appcompat.app.AppCompatActivity;importandroid.graphics.Color;importandroid.os.Bundle;importandroid.widget.TextView;importorg.eazegraph.lib.charts.PieChart;importorg.eazegraph.lib.models.PieModel;publicclassMainActivityextendsAppCompatActivity {// Create the object of TextView// and PieChart classTextView tvR, tvPython, tvCPP, tvJava;PieChart pieChart;@OverrideprotectedvoidonCreate(Bundle savedInstanceState){super.onCreate(savedInstanceState);setContentView(R.layout.activity_main);// Link those objects with their// respective id's that// we have given in .XML filetvR = findViewById(R.id.tvR);tvPython = findViewById(R.id.tvPython);tvCPP = findViewById(R.id.tvCPP);tvJava = findViewById(R.id.tvJava);pieChart = findViewById(R.id.piechart);// Creating a method setData()// to set the text in text view and pie chartsetData();}privatevoidsetData(){// Set the percentage of language usedtvR.setText(Integer.toString(40));tvPython.setText(Integer.toString(30));tvCPP.setText(Integer.toString(5));tvJava.setText(Integer.toString(25));// Set the data and color to the pie chartpieChart.addPieSlice(newPieModel("R",Integer.parseInt(tvR.getText().toString()),Color.parseColor("#FFA726")));pieChart.addPieSlice(newPieModel("Python",Integer.parseInt(tvPython.getText().toString()),Color.parseColor("#66BB6A")));pieChart.addPieSlice(newPieModel("C++",Integer.parseInt(tvCPP.getText().toString()),Color.parseColor("#EF5350")));pieChart.addPieSlice(newPieModel("Java",Integer.parseInt(tvJava.getText().toString()),Color.parseColor("#29B6F6")));// To animate the pie chartpieChart.startAnimation();}} - Abra el archivo MainActivity.java allí dentro de la clase, primero cree el objeto de la clase TextView y la clase de gráfico circular.
Publicación traducida automáticamente
Artículo escrito por AmiyaRanjanRout y traducido por Barcelona Geeks. The original can be accessed here. Licence: CCBY-SA


